Back
New Checkout UI and Customizable Checkout Pages
What is it & why you need it
Now, you can customize the checkout page and create your own unique design to make a more product-specific checkout page UI.
This will allow you to create highly convertible checkout pages for any specific product instead of using a generic design. As a result, you can grab the attention of eager customers and ultimately increase the chances of selling your products.
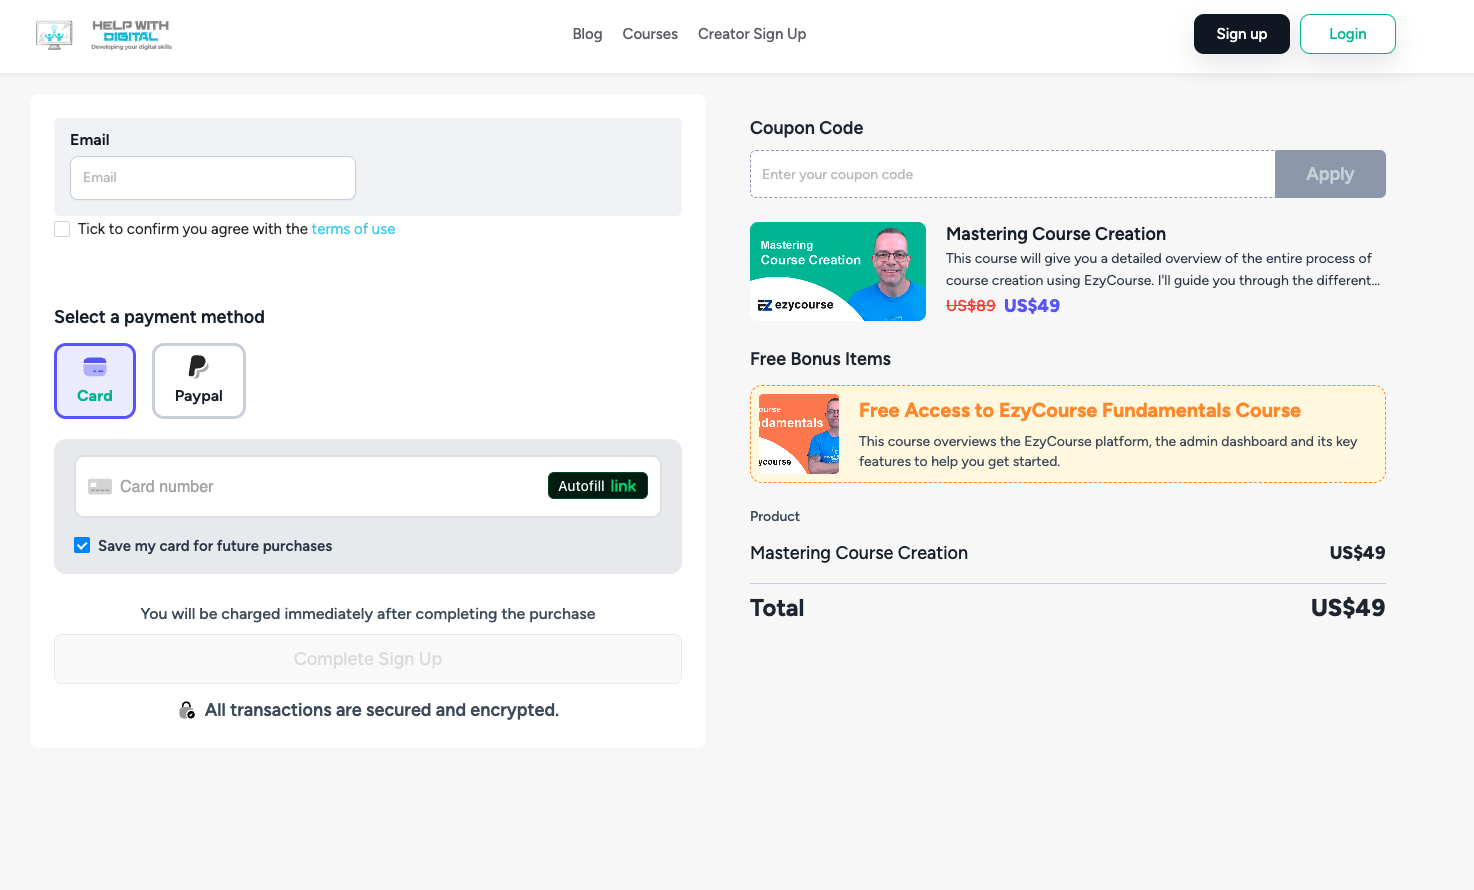
How it works
Previously, you had the default checkout page which was already built for you when you signed up. And you did not have the option to use the builder and customize the checkout page.
Now, you can use the builder to make changes and customize the checkout page in your own way. You can create separate custom pages and use the “Checkout Page” widget to customize the checkout page for any specific product (course and membership for now).
For the product-specific custom checkout page, you’ll have to go to the product settings also and select the custom page so that it successfully redirects to the selected page.
How to get started using it
You’d have to first enable the “Editable checkout page” option from Site Settings -> Global Settings. This will make a default checkout page appear on the Website Builder -> Pages menu. Keep this option disabled if you wish to keep the default checkout page hidden. Note that this default page is not the previous one, it has a more sleek design.
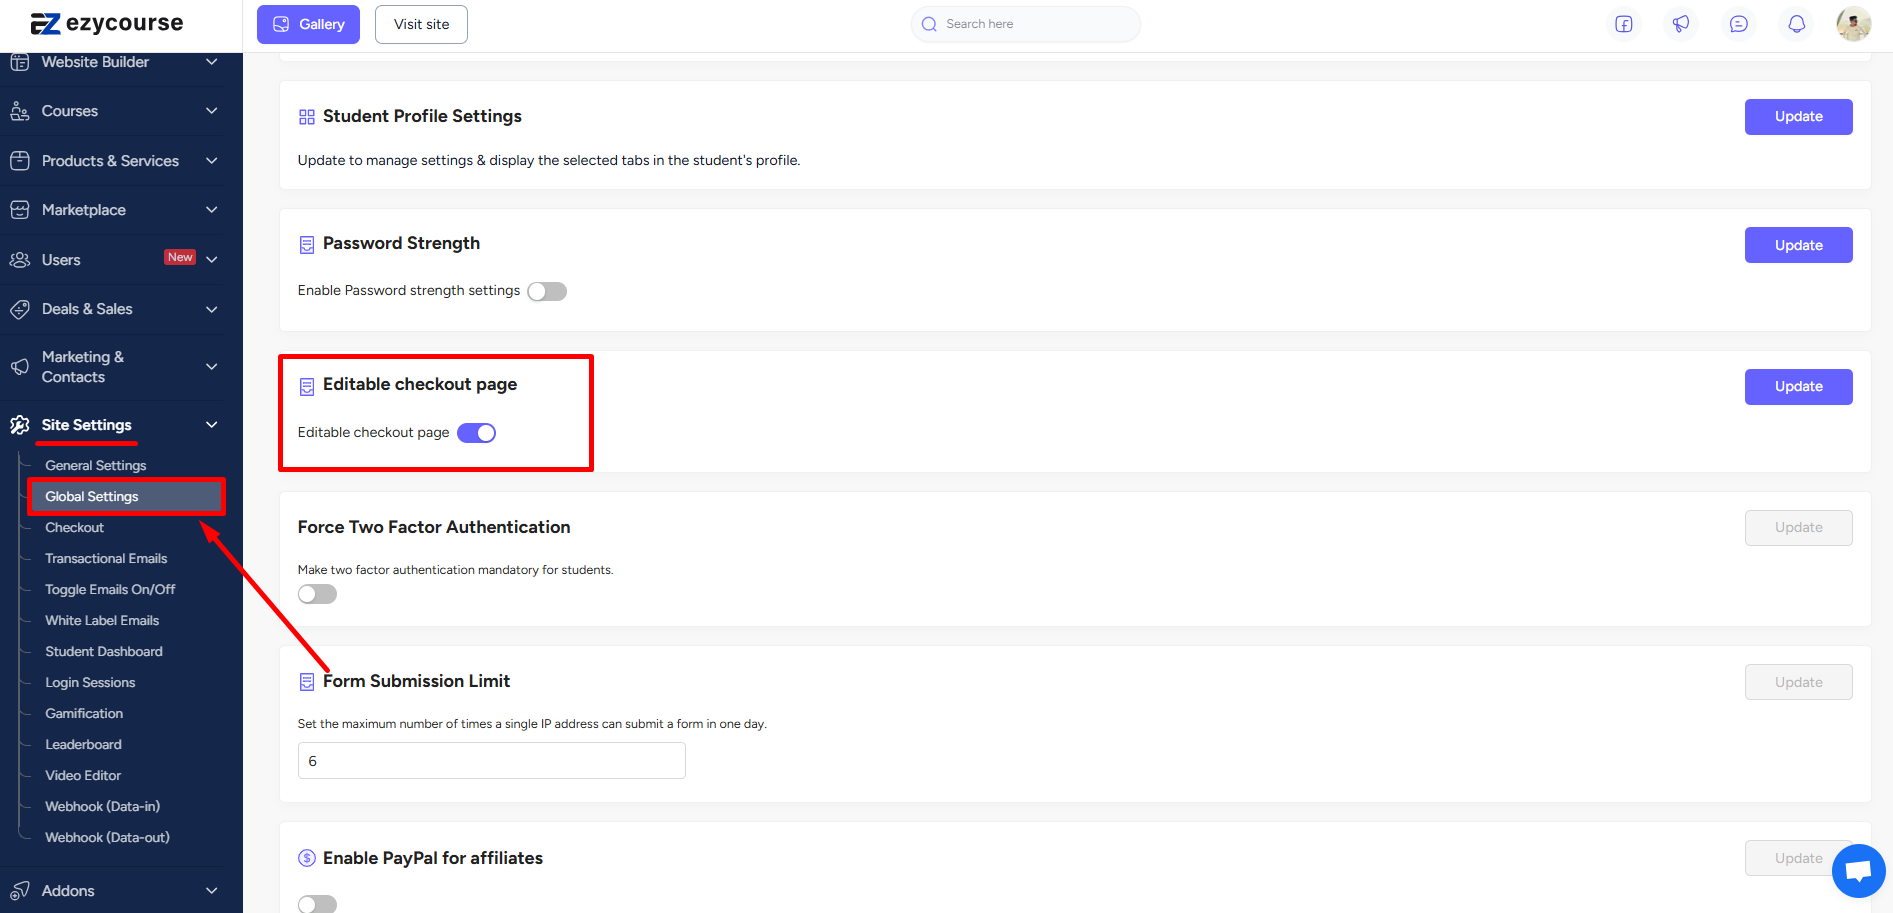
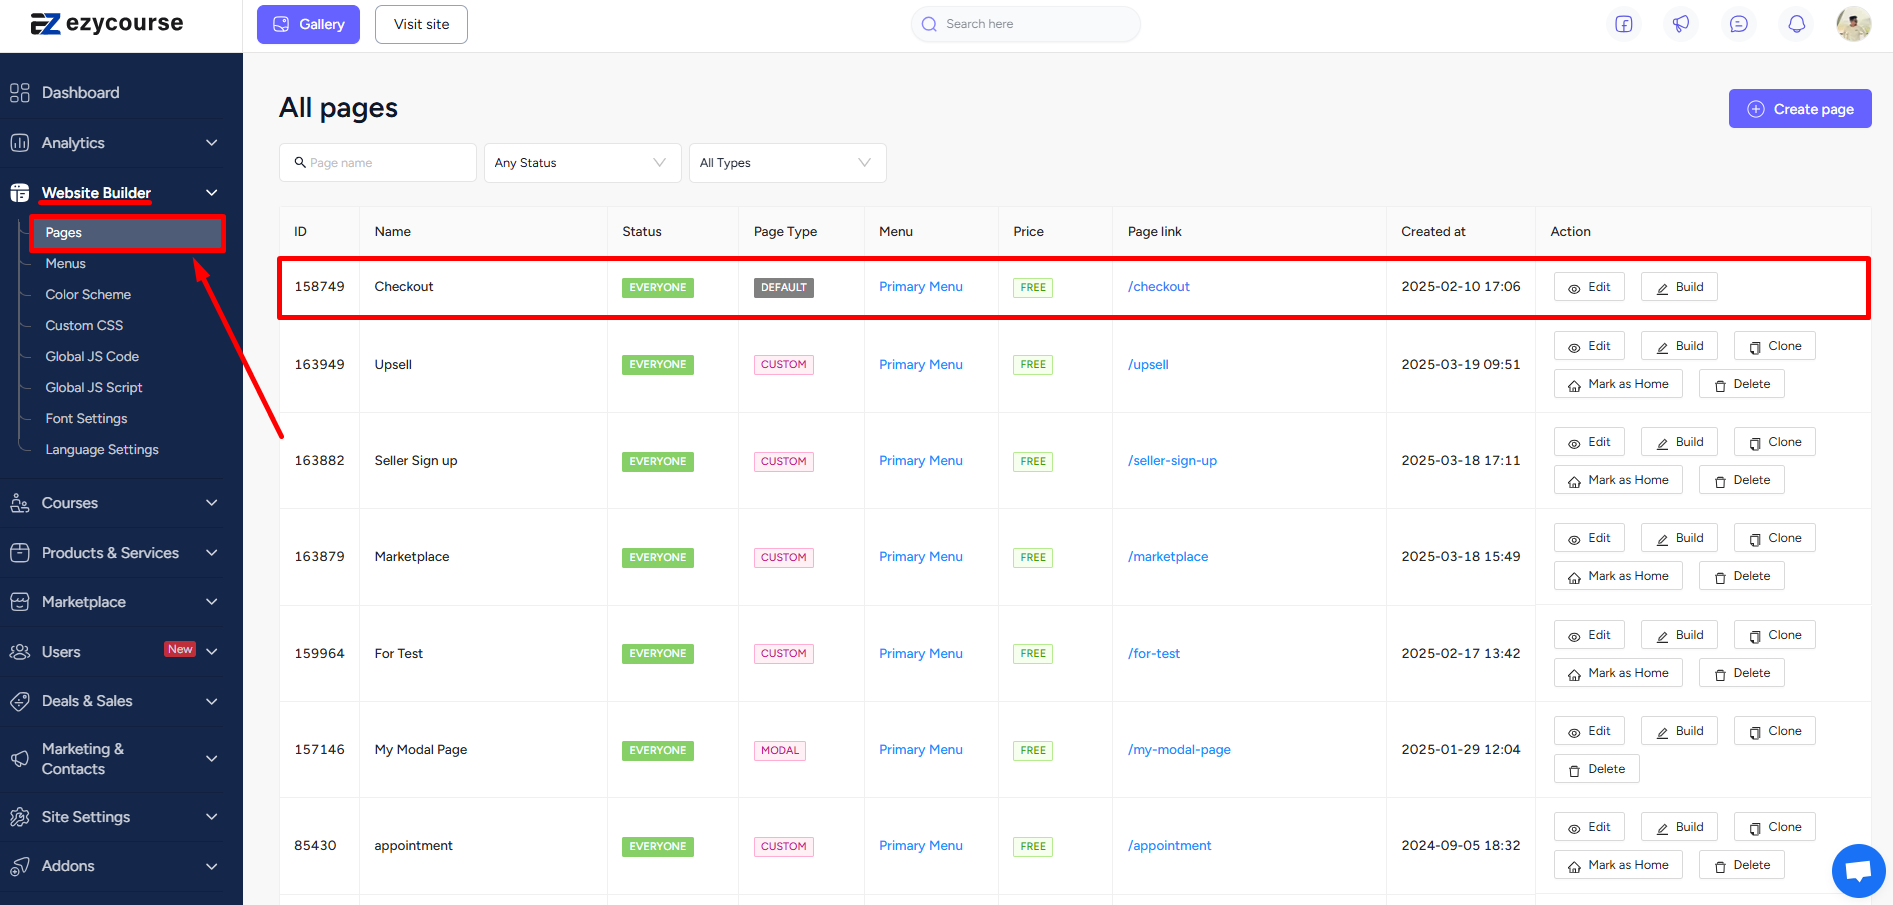
Once enabled, you will find the default checkout page on your dashboard. Go to Website Builder -> Pages.
[Note: If the default page doesn’t show, try clicking the “enroll now” button of any course on the All-products page from student end.]
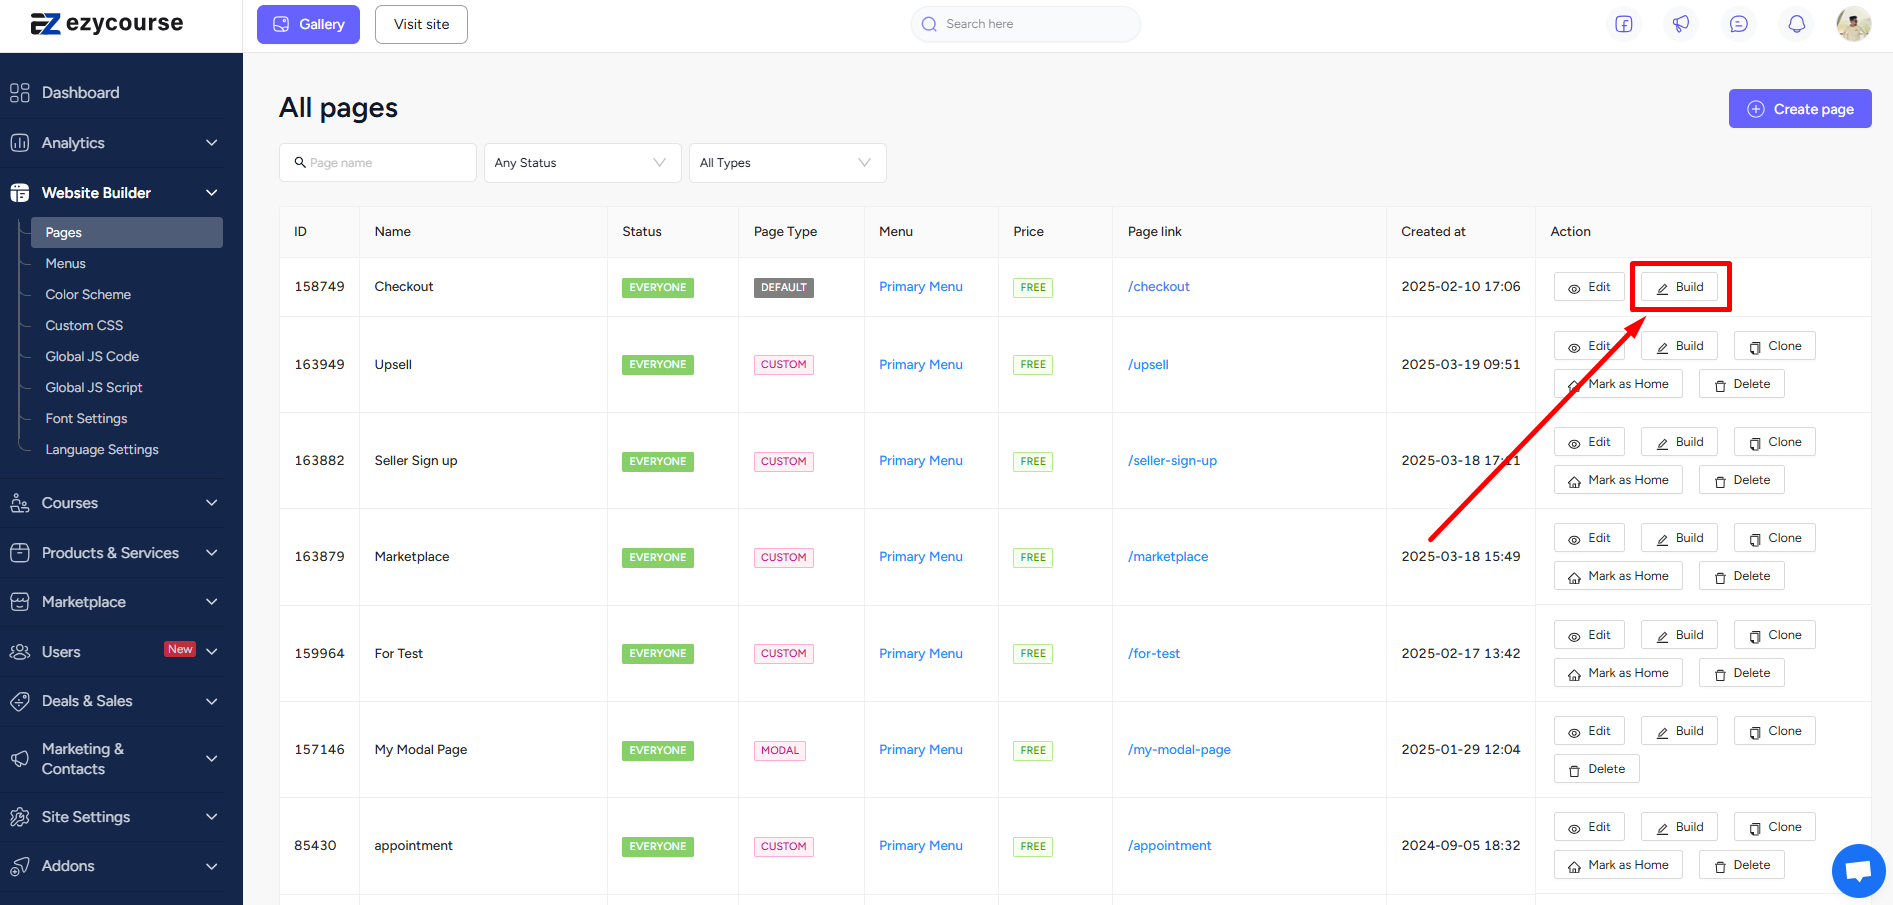
Click Build to edit and make changes to the default checkout page using the builder. For first time only, you’d have to drag and drop the “Checkout Page” widget for the default page, after enabling the toggle option from Global Settings.
To set a custom checkout page for any specific product, you have to first create a separate page.
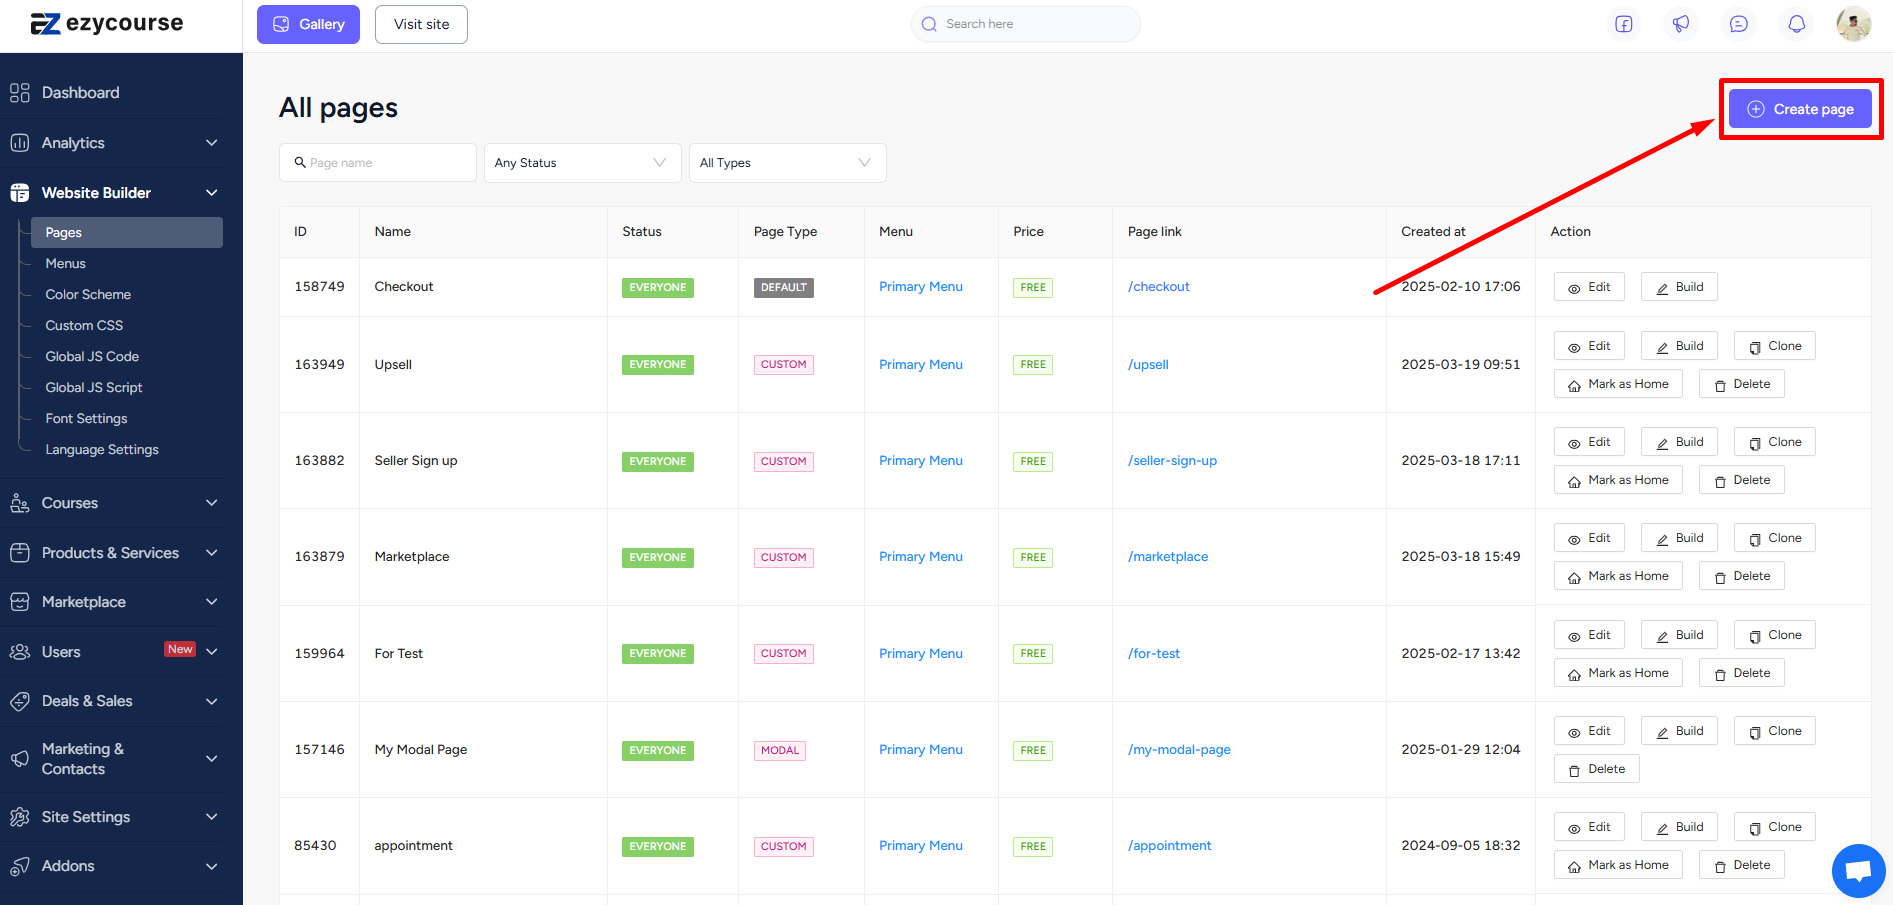
And then simply use the “Checkout Page” widget on the builder. You can design and make the checkout page unique and related to any specific product.
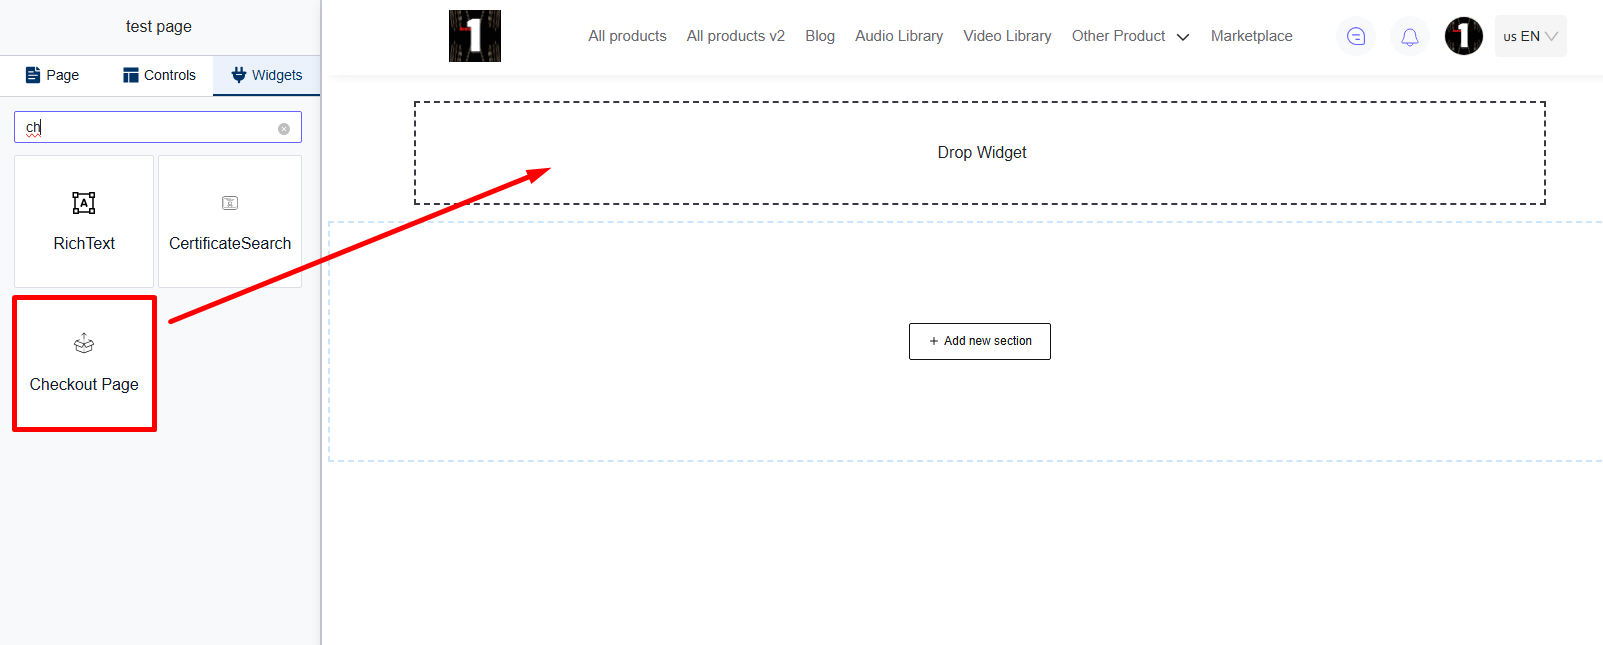
To define the specific product, first select the product type from the dropdown option. And then choose the particular product itself.
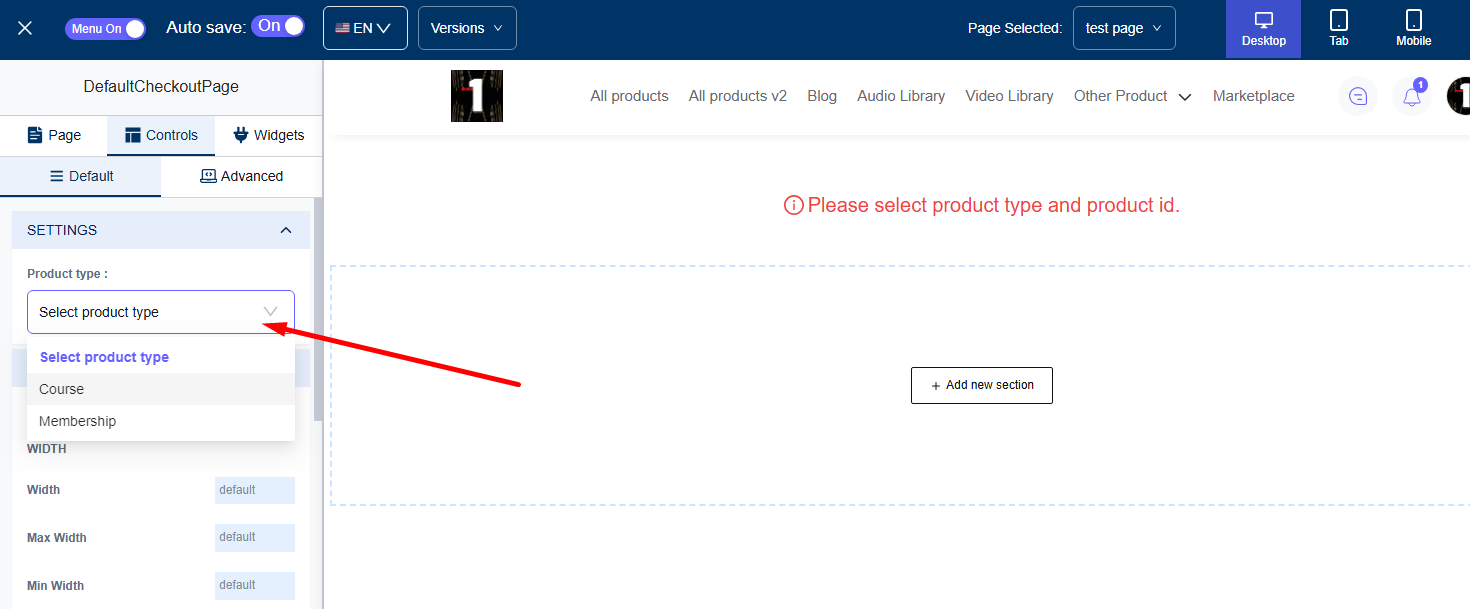
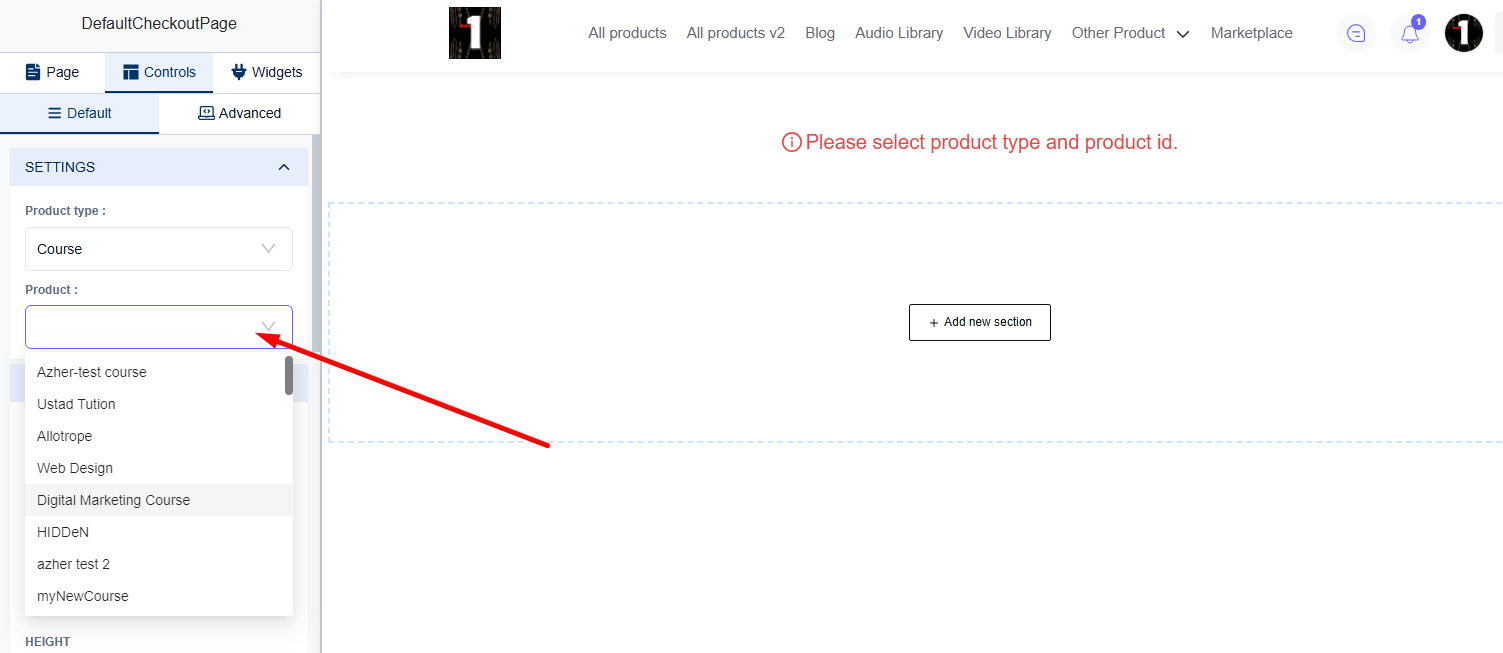
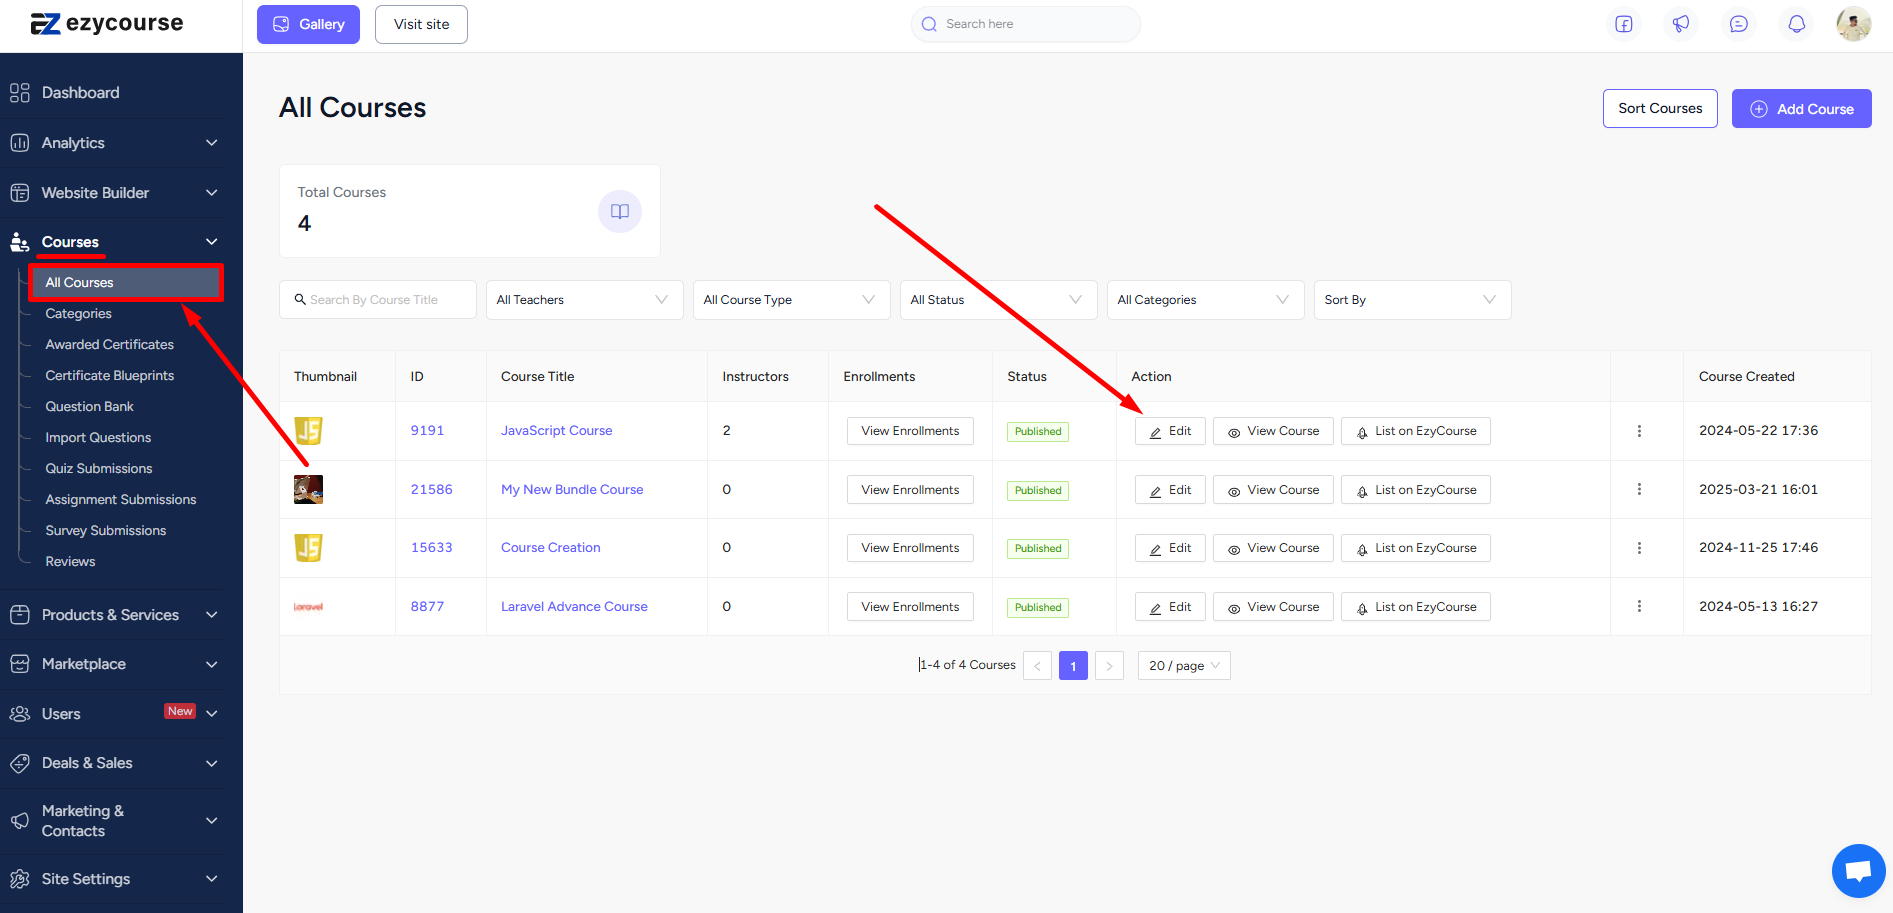
Now that you’ve created the custom checkout page, all you have to do is select the page on the product setting. To do that, head over to Courses -> All Courses -> and Edit on the course you want.
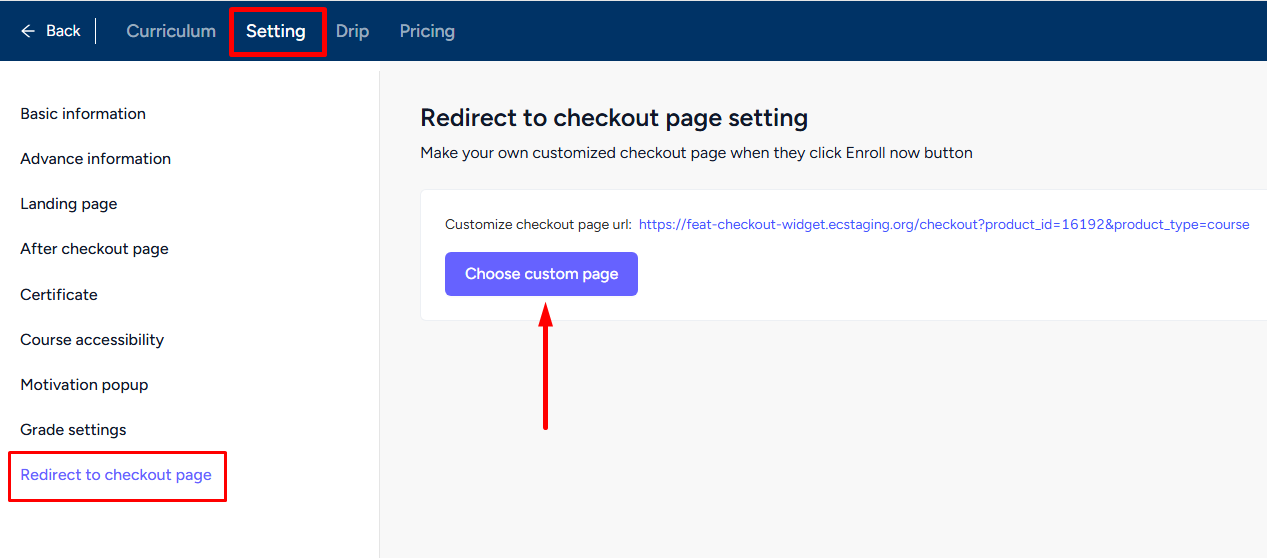
From there, go to the Setting tab and then select the “Redirect to checkout page” option. Click the Choose custom page button to select the page you want to show as checkout page for this particular course. Save to keep the changes.
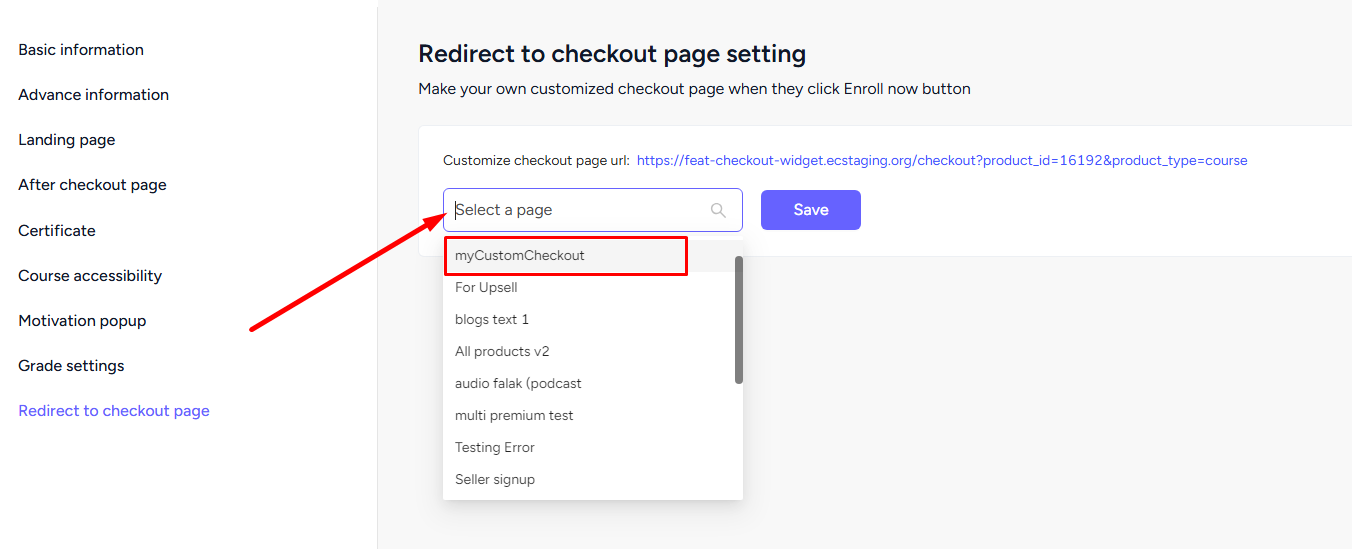
Once you select the page, the custom checkout page will show for this particular product when you are previewing checkout from the dashboard, or when students are viewing from your website.
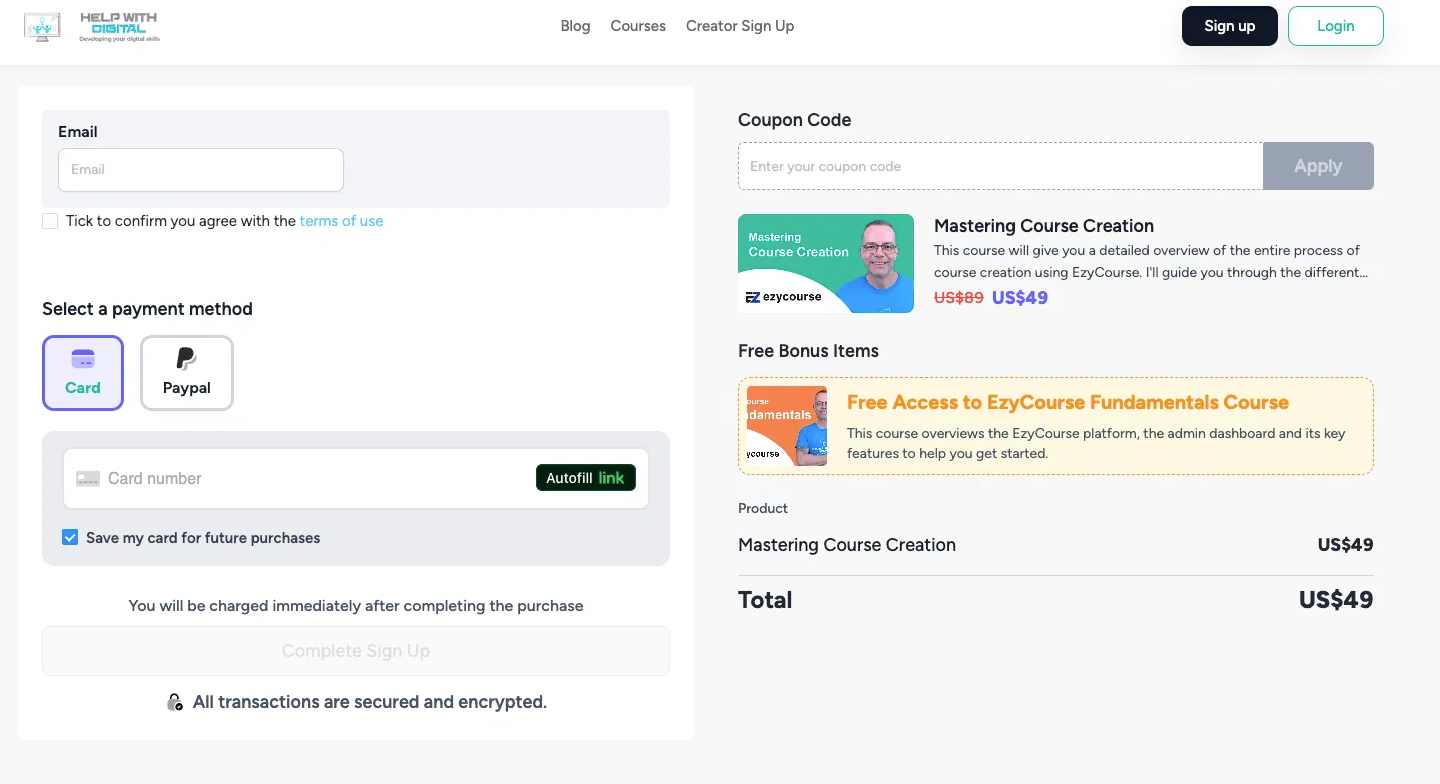
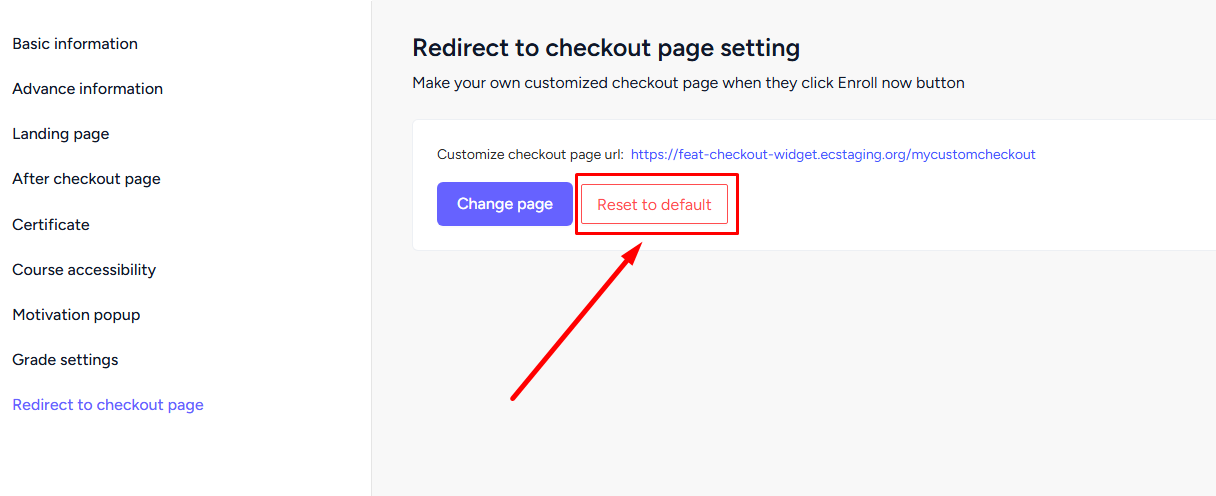
You can always go back to the default checkout page.
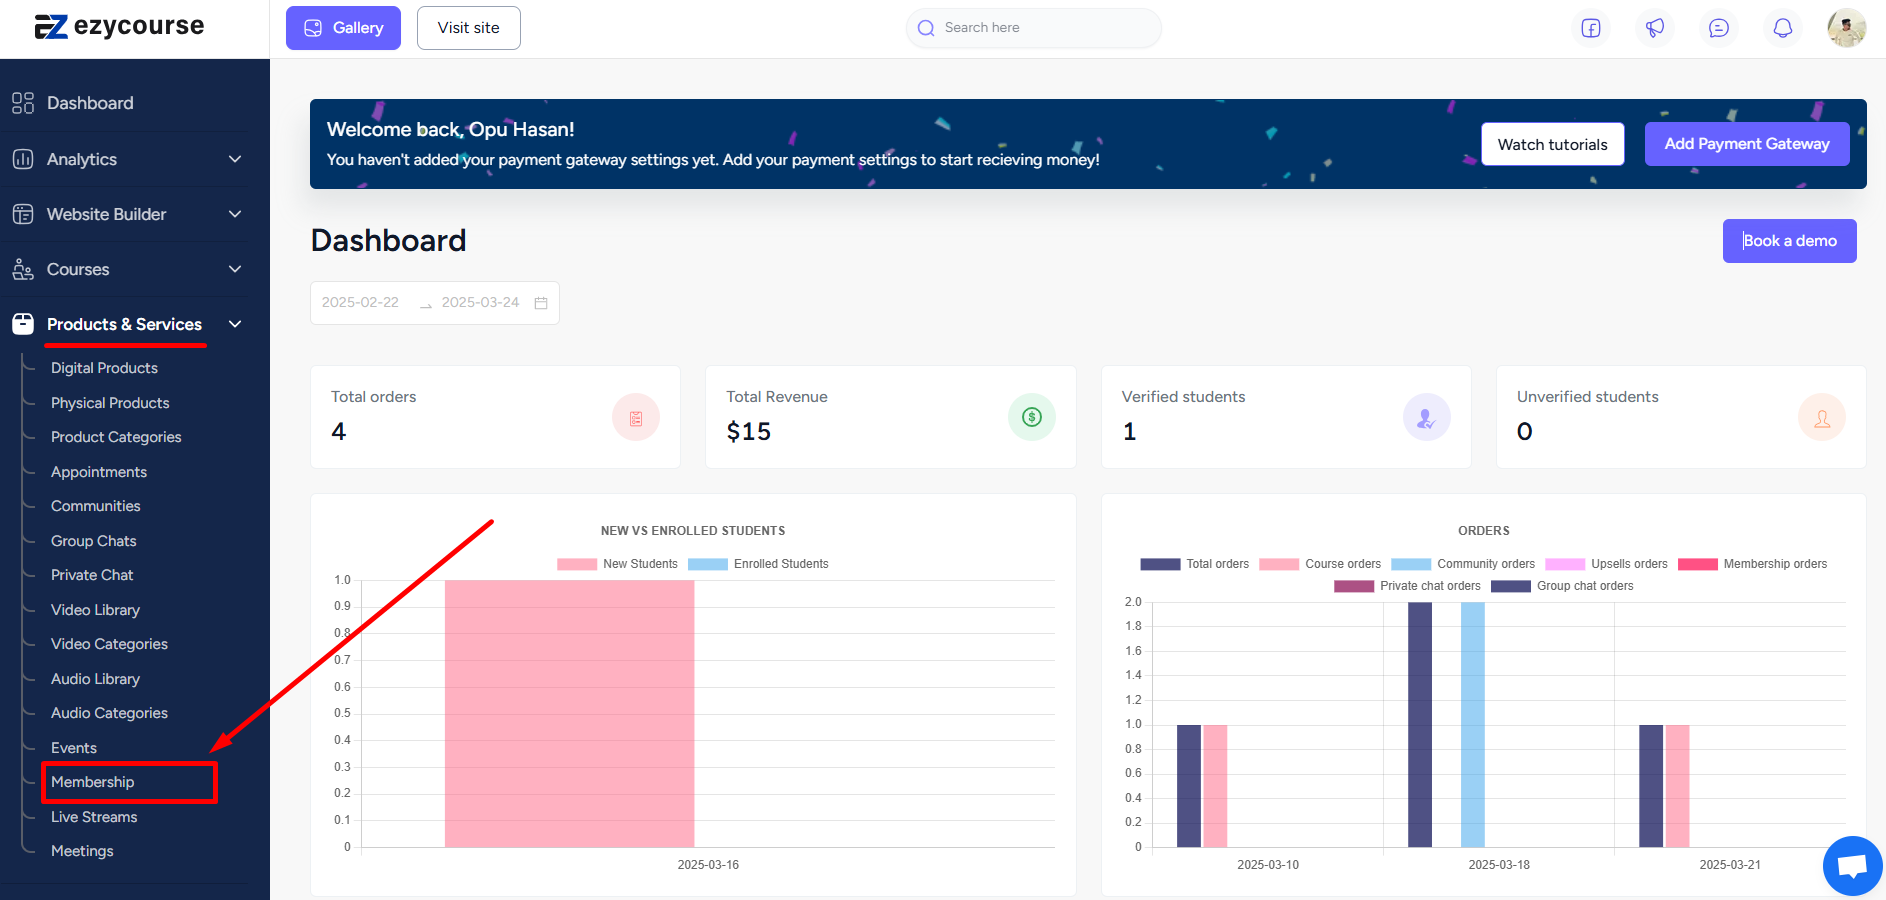
You can also set up a separate custom checkout page for memberships. After you create the custom checkout page, go to Products & Services -> Membership.
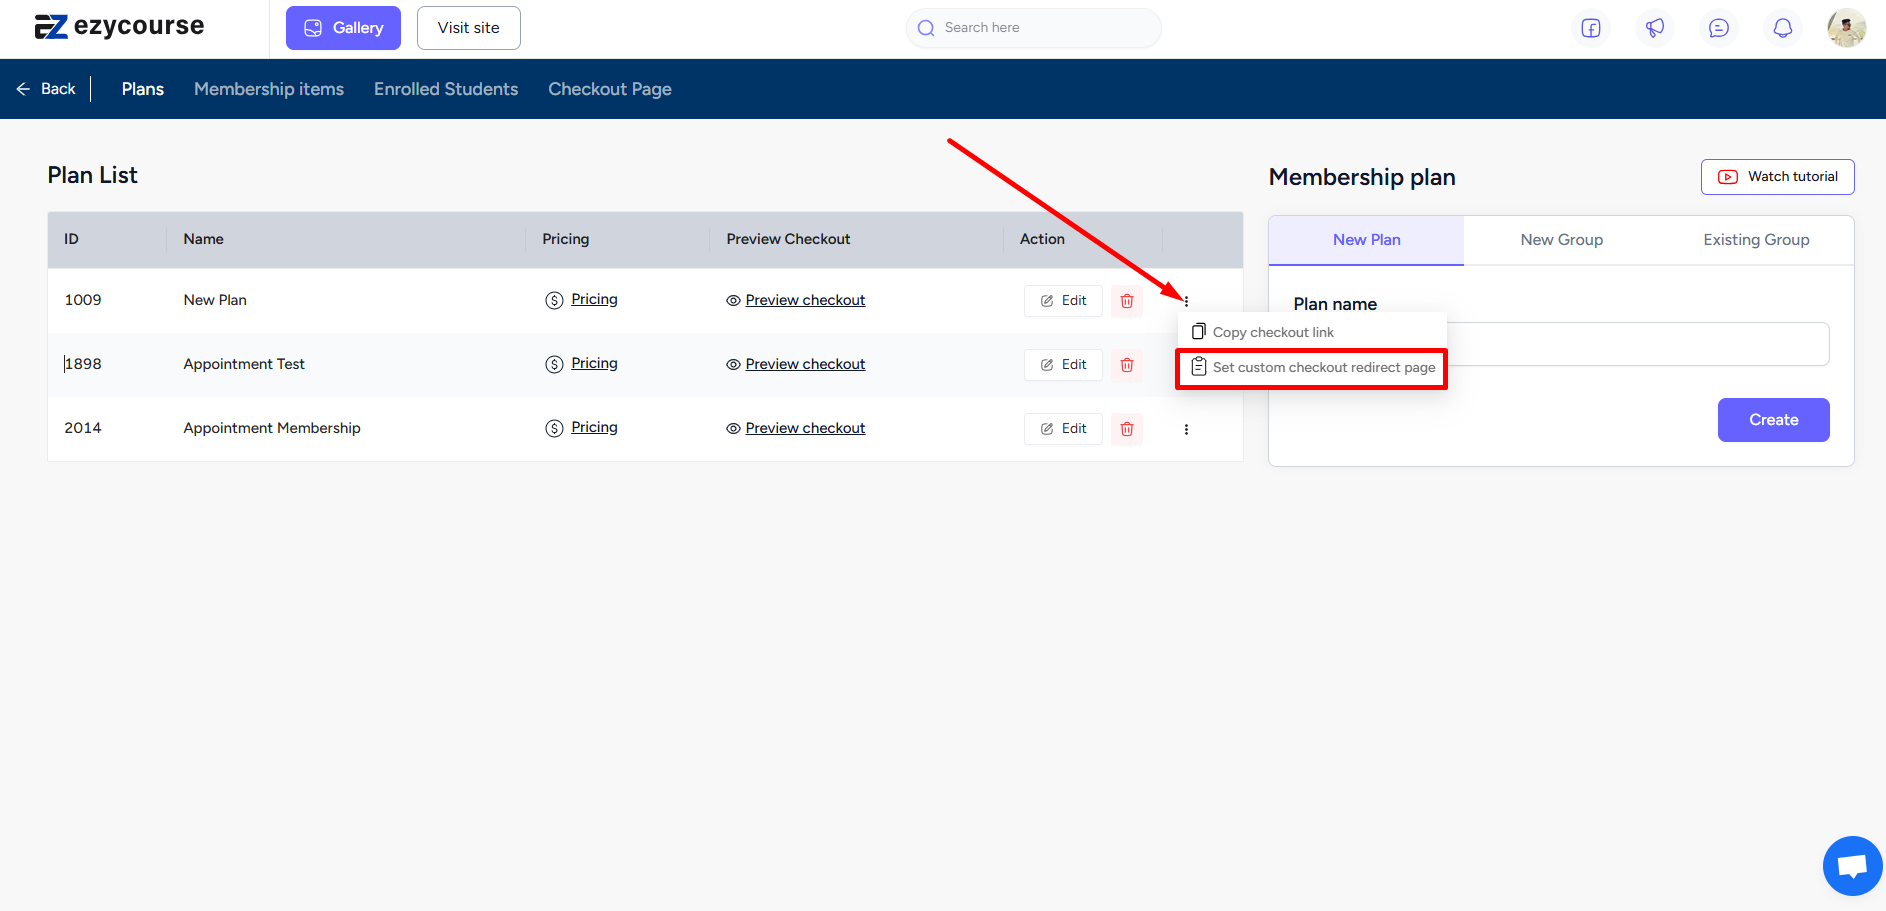
Click the three dots on any membership plan and select the “Set custom checkout redirect page” option.
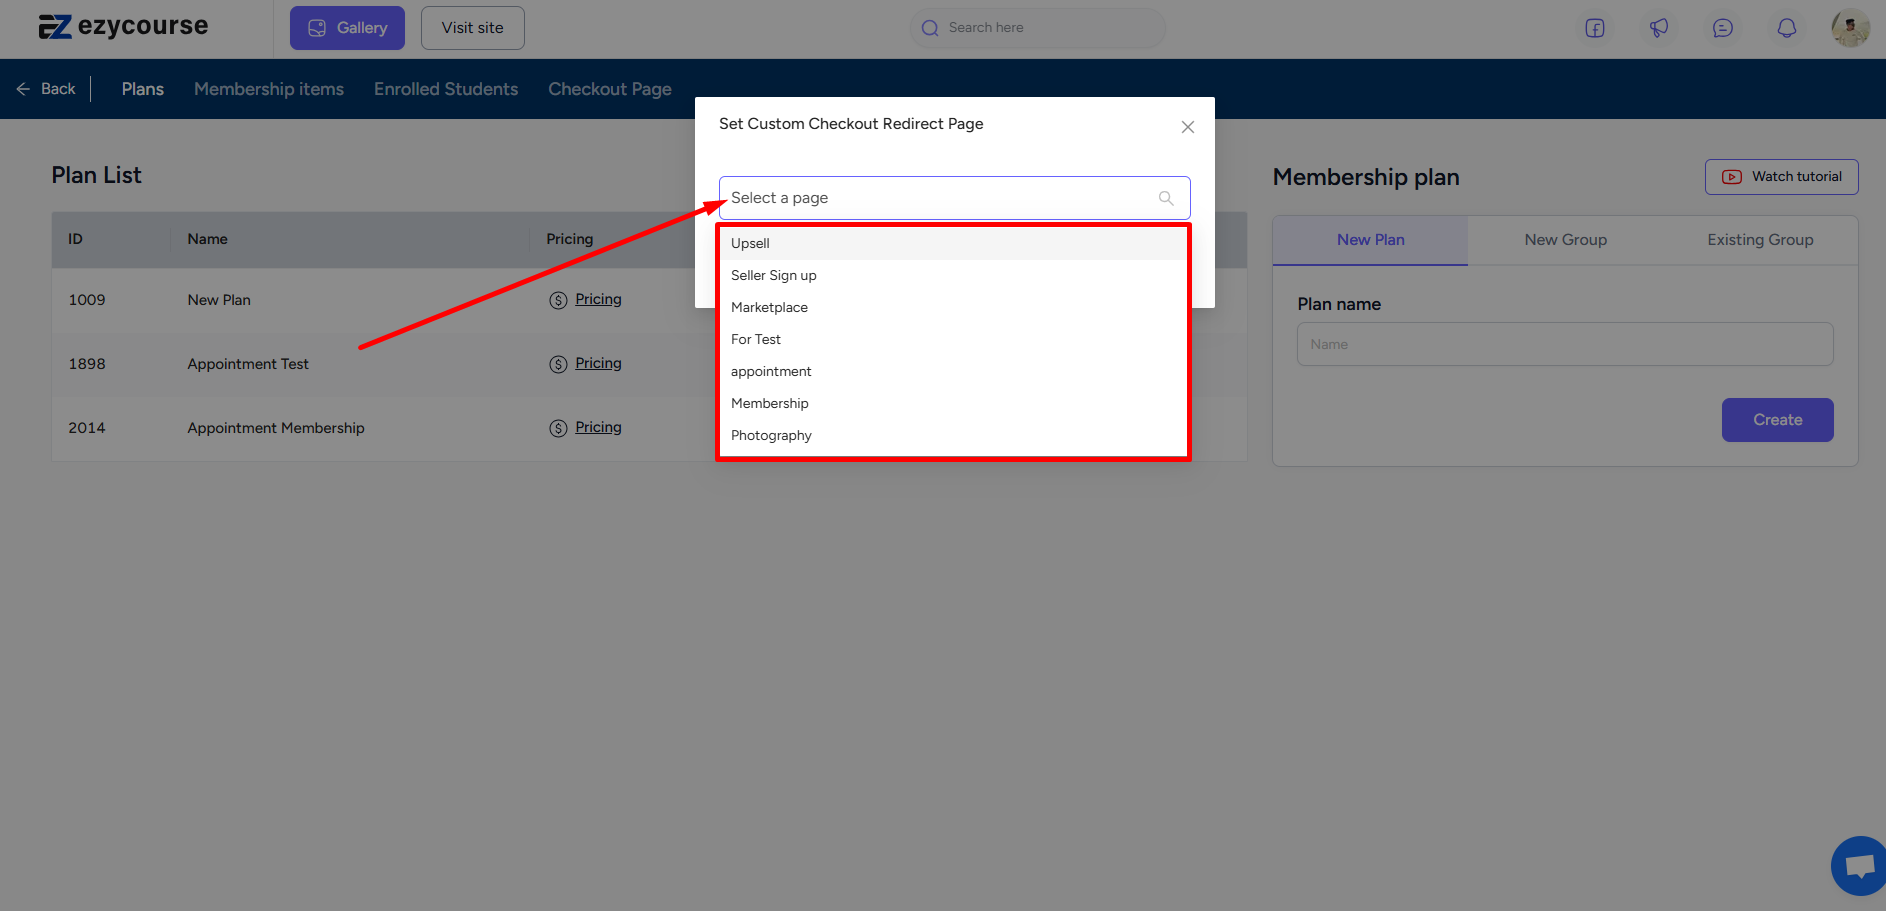
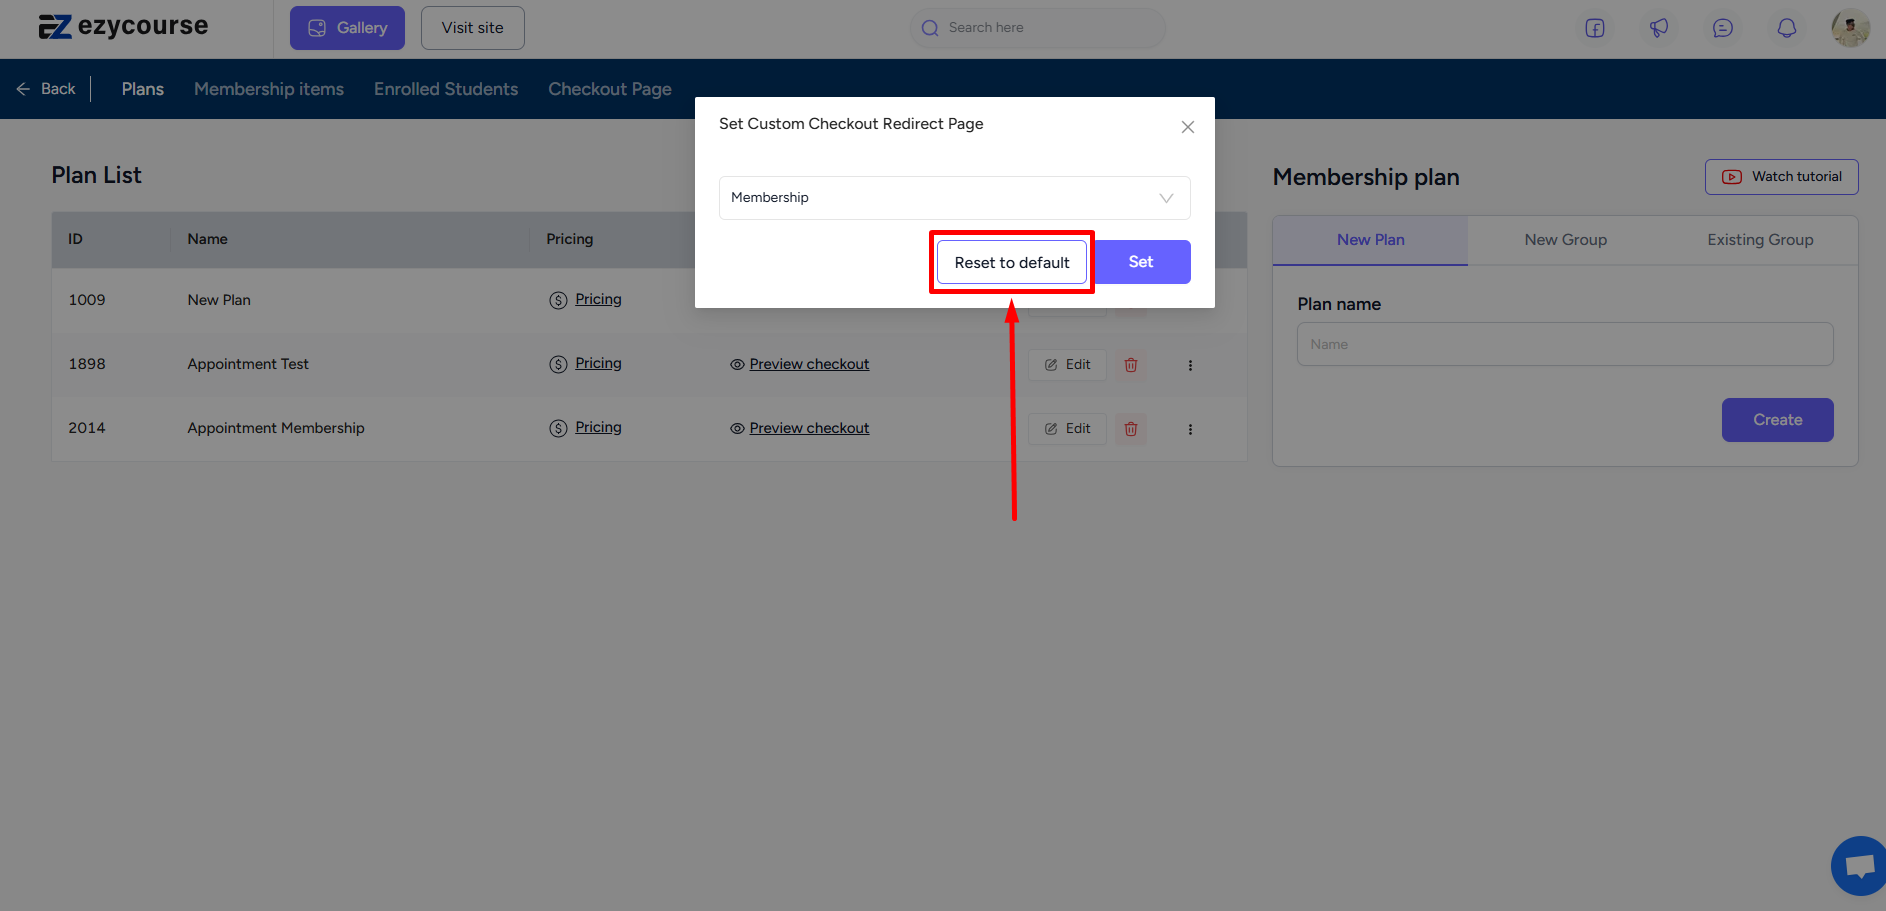
On the popup, you can select the custom page where you’ve designed the checkout page for this particular membership plan.
You can reset the checkout page to the default one at any time.
Note that if you change the path of the custom checkout page then you’d have to go to the specific product setting and select the custom page again to ensure proper redirection.