
Back
How To Add Knowledge Base on Your Site
What is it & why you need it
The Knowledge-base is where you can add documentations and tutorial guides to make it easy for students to find specific information without needing direct support.
With the knowledge base, you can easily improve the credibility of your platform, making learning more accessible. Your students can refer to documentations or tutorials at their own pace, leading to more satisfaction.
The feature will let you categorize your guides so that students find it easier to navigate and find answers. In addition, they can use a search option to instantly find exactly what they are looking for. You can even make announcements for newly added articles so that learners are notified as soon as you publish. In addition, public documentation and guides can attract organic traffic from search engines, leading to potential new customers.
How it works
The Knowledge base will be available as an EzyCourse add-on. Only if you have the addon, you can control all the settings from your admin dashboard.
After you enable the announcement popup option, you can add new articles and categorize them. You can show newly added articles as announcement popups to your students. Categorizing will require you to add category and sub-category.
To show the knowledge base on your website, you can use the EzyCourse Website Builder to create a custom page. You’ll find a pre-built widget, simply drag and drop to create your own help center in seconds. It wiill be up to you to choose the categories you want to show.
Students will be able to navigate to sub-categories through a category, and access the relevant articles. In addition, they’ll be able to search for specific docs with a convenient search bar.
How to get started using it
After you get the add-on, enable it from Addons -> Announcement Popups and Knowledge Base. Turn on the toggle option and click the Update button.

Once you enable it, you’ll be able to access other options. Before adding any article, first create a relevant category and sub-category. To create a category, go to the Categories tab and click the Add New Category button.

Name your category and click on Create. You can sort and order categories, simply click the Sort Categories button.

With a category added, you can go on to create a sub-category. Go to the Sub Categories tab and click the Add New Sub-Category button on the top right corner.

Name the sub-category and choose the category under which you want to keep it. Click Create to add a new sub-category.

You can sort the sub-categories under a specific category. To do that, click the Sort Sub-Categories button.

Select a category first to organize its sub-categories. And then simply drag and drop the cards to order the sub-categories. Make sure you save the changes after sorting.


To add a new article, go to the Announcements & Knowledge tab and click the Add New button. This will take you to the editor where you can write the article.

Apart from the article title, content, and short description, you can choose the category and subcategory for this article. The featured image will show when your article link is shared anywhere.

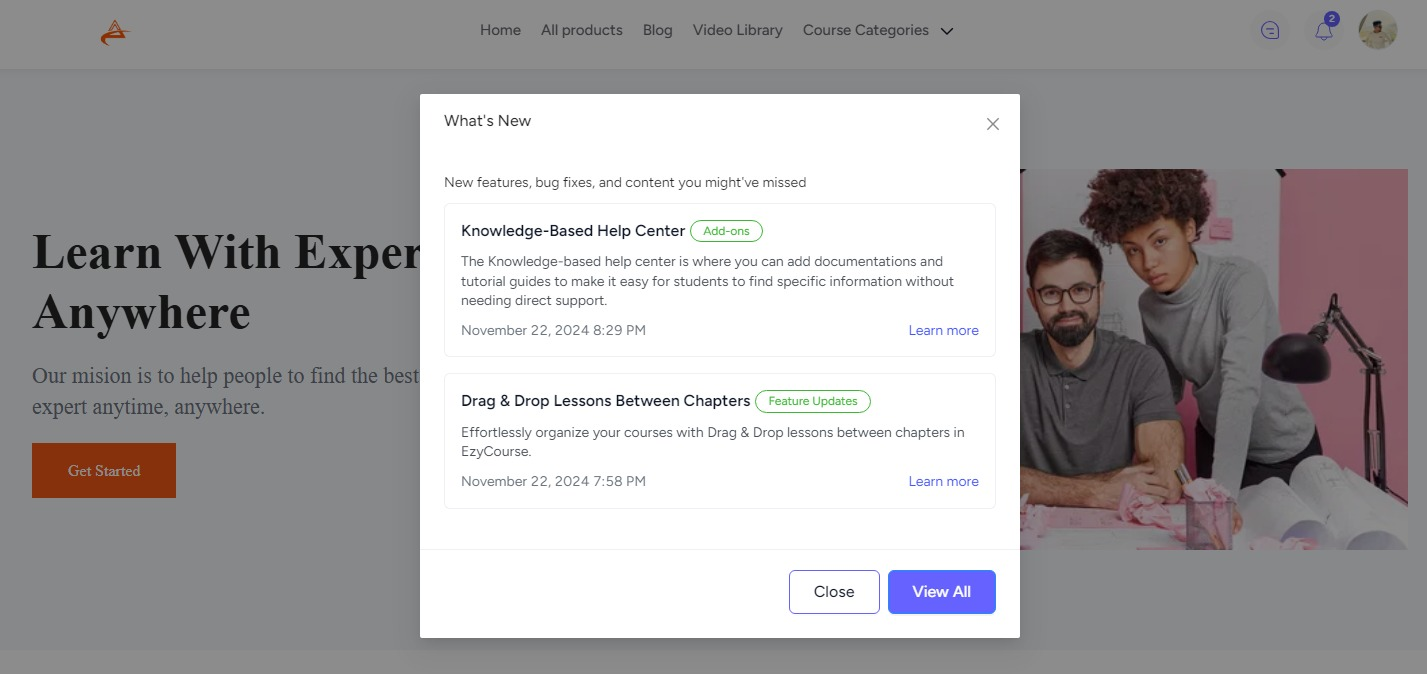
You can choose to publish the article right away or keep it in draft. You can also show the article as an announcement popup.

The announcement popup shows exactly like you see when new EzyCourse features are launched.
To sort articles, click the Sort Announcements button.

First, select a category and then a sub-category under the selected category. This will show all the articles under that particular sub-category.

You can then drag and drop articles to sort them. Notice that there’s a filtering option also allowing you to quickly sort based on latest, oldest, and A-Z (Alphabetical). Save changes after sorting.

You can search and find any article quickly using the search option.

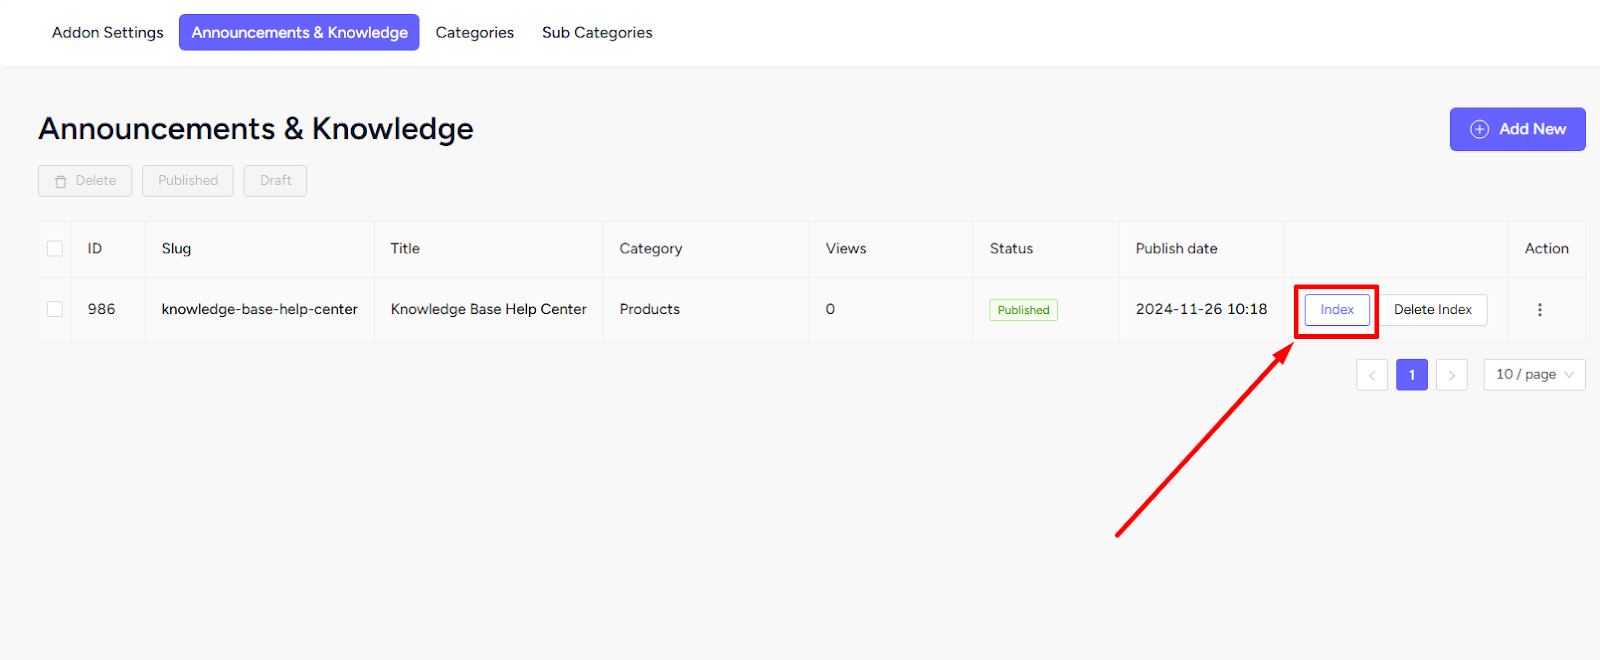
For the search bar to retrieve data instantly when students search, you have to create the search engine for this addon. To do that, simply click the Create index button on the Addon Settings tab.

Once you create an index, all you have to do is choose the articles to index. This will give your users smart suggestions for the indexed articles when using the search bar option. You can also delete the index for an article to remove it from appearing on the smart search suggestions.

To show the complete knowledge base on your website, simply create a new custom page from Website Builder -> Pages -> Create page button.

On the builder, simply drag and drop the Help Center widget.

By default, all the existing categories will be shown on the page. But, you have full control to choose which ones to show.

You can also edit the text color of the title text and add a banner image on the page, and make other customizations to the page.