
Back
Navigating the Dashboard
EzyCourse admin dashboard is filled with features and options for you to explore. But, there are a few primary areas which you should get acquainted with as you begin creating courses, products, and building your site.
In this article, we’ll explore those main features on your dashboard.
Landing Page: Platform Analytics & Reports
The first page you see when you log in to your dashboard is all the reports and analytics with regards to your platform. You can view important data such as earnings, total orders, students, and more.

From here, you can measure the performance and get an overall idea of how things are going for your platform.
Website Builder: Build Your Site from Scratch
From our Website Builder menu, you can access all the features related to building and managing your site look.
The Pages option is where you create, edit, and manage the individual pages of your site. You will find many default pages already built and ready to go such as the home page, footer, etc.

You can use pre-built templates, powerful widgets, elements, blocks, etc. to customize pages. More importantly, EzyCourse has an AI Builder to help you quickly build and edit pages with simple prompts.

The Menus option is where you can create a new menu, add menu options to existing menu, and more. As a default, you’ll find the primary menu already created on your platform.

Easily customize a top banner, set up variables for fast and consistent designing within the builder, and choose the color branding for your site. Customizing your site is super easy and anyone can do it.

Moreover, you can add custom CSS, JavaScript code, and add any third party scripts from the Custom CSS, Global JS Code, and Global JS Script options respectively.

You can choose the font-type for your website or even upload a custom font to use. For this, go to the Font Settings.

The Language Settings option is where you can utilize the magic of multi-language translation and make your website accessible to users of different regions.

Read more the Website Builder 2.0 in our help center.
Course Overview: Seamless Course Creation
The Courses menu on the left sidebar is where you can get down to business and manage your Courses.
Go to Courses -> All Courses. From here, you can create, edit, view, and manage all your Courses. Adding chapters, lessons, accessing Course settings, setting Course price, etc. are all managed from here.


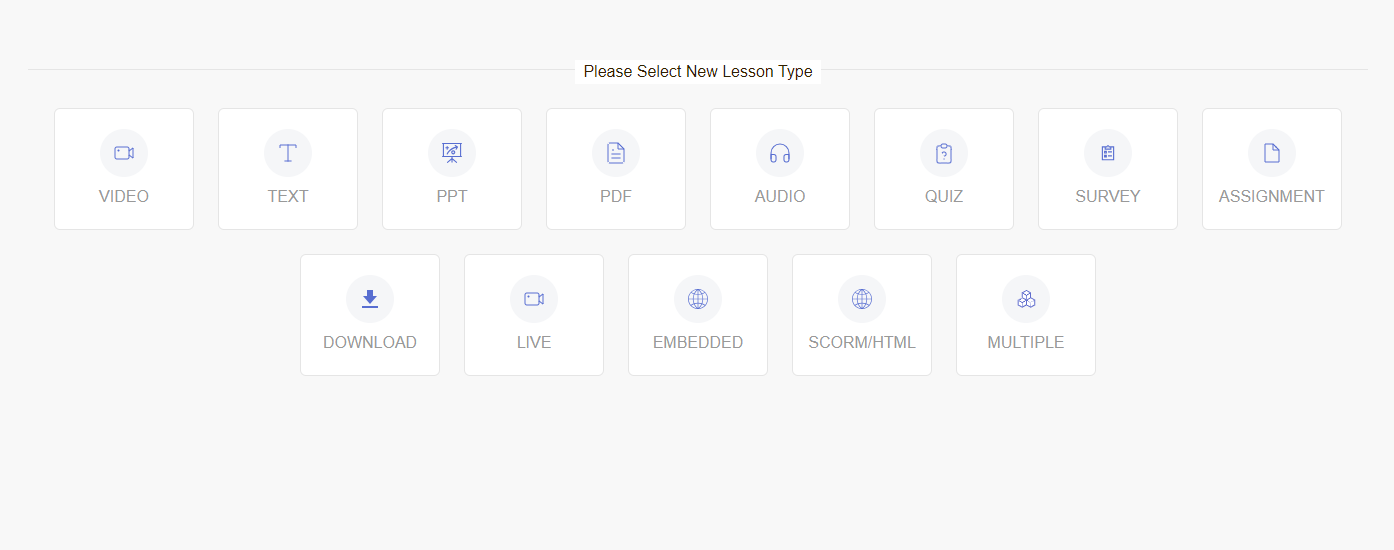
You can create over 12 different lessons, including Live Lesson and SCORM/HTML lessons, and truly provide the best learning experience to your students.
Click the Course categories option to create new categories and add Courses to existing categories. This helps to keep your Courses organized and easy to find for you and your users too.

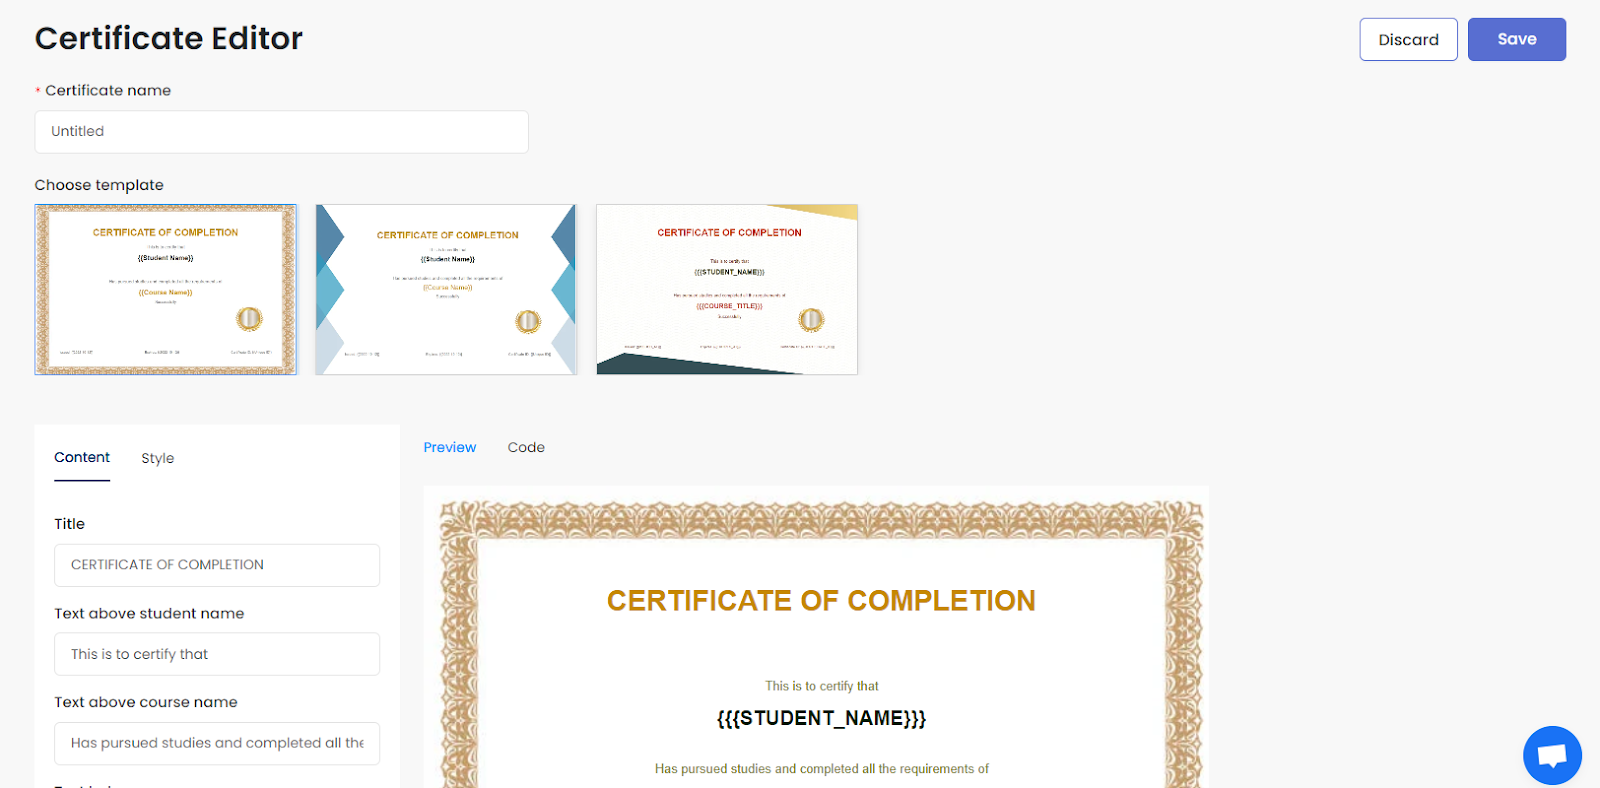
The Certificates Blueprints menu is where you can create new certificates and edit existing ones. You can use pre-built certificate templates, add styles, and customize the certificates in your own way.
And the Awarded Certificates menu is where you can view all the certificates issued from your school.

You can also manage assessment lessons from here and see all the quiz, assignment, and survey submissions. Menus for adding or importing quiz questions are also accessible from here.

Reviews and ratings for your courses appear on the Reviews menu from where you can approve to showcase on the course details page.

Also read : Course Ratings & Reviews
Coaching Programs: Offer Personalized Learning
You can create different types of coaching programs from weekly structured ones to phase based transformation type. Everything related to coaching is under the Coaching menu. That includes creating a program, editing, setting pricing, and so on.

Each programs have a feed where you can add learning materials, trackers, activities, etc. and track the progress of your clients.

Also read : EzyCourse Coaching Program
Community Overview: Your Own Distraction-free Learning Space
All the activities related to your Communities are accessible from Products & Services -> Communities. You can create, edit, and manage your Communities from this menu.

Membership Overview: Enable Site-Wide Membership & Sell Membership Bundles
You can bundle up and offer multiple products in a single package, and sell as a Membership product on your site. Moreover, you can also offer true membership experiences with tier-based upgrades and downgrades by creating membership groups.
For creating Membership bundles, go to Product & Services -> Membership. From here, you can create a Membership plan, add any type of products to the plan, and more. Note that you can sell memberships to regular customers (students) and marketplace sellers.


To enable Site-Wide Membership for your platform, go to the Site Settings → Global Settings menu from the left sidebar.

Also read : Site Wide Membership & Seller Membership Plans
Access All Products
All the products such as Communities, Appointments, Digital and Physical products, Audio and Video Libraries, etc. are accessible and manageable from the Products & Services menu.

Also read : What you can sell on EzyCourse
Managing Users
The Users menu is where you can manage all the different users on your platform. These include Students, Developers, Teachers, Revenue Partners, and Site Admins.

From the Students option, you can create students, see their enrollments, view course progression, and much more.
Learn more: Site Owner and User Roles | Manage Users
Marketing & Contacts: Your Home to Effective Marketing
The Marketing & Contacts menu is where you get your marketing tools from email marketing campaigns to all the useful stats.

Once you set up the email delivery service, you can use all the options which includes -
• Email statistics that give you all useful information about your email campaigns from graphs to numerical values.
• Email campaigns is where you can create and launch your campaigns, and also view each email campaign in detail.
• Email automation & sequence which lets you create automated email sequences and target audience based on their activities.
• Email Automation Workflows lets you create smart, visual automation flows. Instead of basic email sequences, you can build dynamic workflows that respond to user behavior.
Also Read: Email Automation Workflow
Other options under Marketing & Contacts are: Tags, Email Templates, Forms & Contacts, and Push notifications for your mobile app.
EzyCourse Settings
Expand the Site Settings menu to get familiar with the settings related to your platform. From here, you can -

• Edit site information
• Set global settings
• Integrate payment gateways
• Set checkout settings
• See transaction & system email settings
• Update student dashboard
• View login sessions of users
• Access video editor with AI caption generator and more
• Gamification for students, and more.
Read our complete site settings documentation to learn more about it.
Search Anything on Your Dashboard
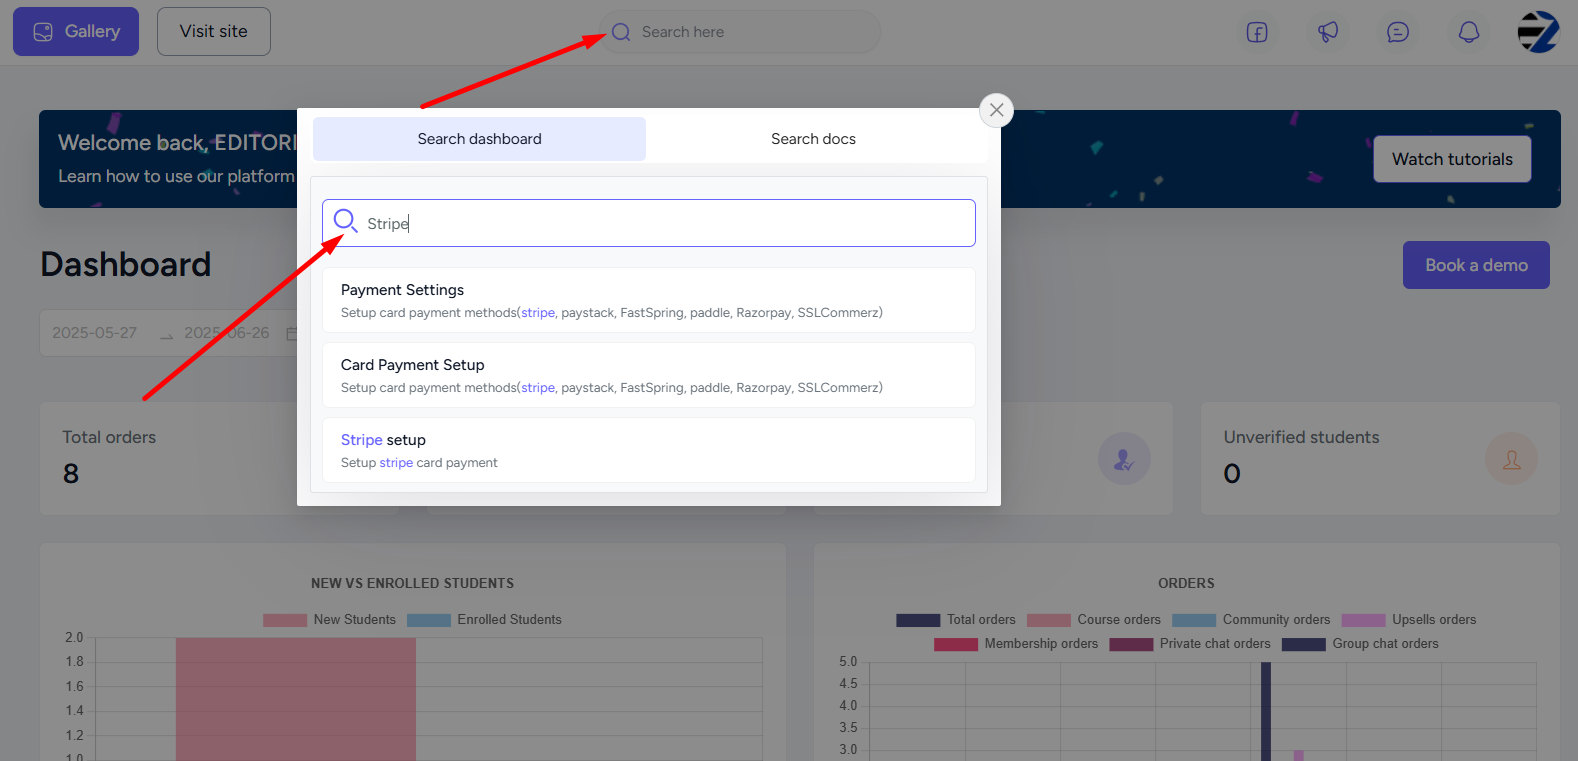
While we’ve discussed some of the main options you should get familiar with, there are definitely a lot more for you to explore. You can always use the Quick Find search bar to instantly find and jump into any menu or settings on your dashboard.
Simply click the search bar and search for anything on your dashboard!
Explore & Learn More
• Site Owner and User Roles
• What you can sell on EzyCourse
• How to sell your EzyCourse products