
Back
Set up FastSpring payments
How to set up FastSpring on EzyCourse
Set up the convenient FastSpring payment system on the EzyCourse platform. And start receiving payments faster with hassle-free transactions.
Here, we will guide you through the step by step process from creating a FastSpring account to selling products on EzyCourse with FastSpring payment.
Step 1: Create FastSpring Account: Visit FastSpring's website and create an account.

Step 2: As soon as you verify your FastSpring account, you will be directed to the FastSpring dashboard. Navigate to the Developer Tools menu and click on API Credentials/APIs.
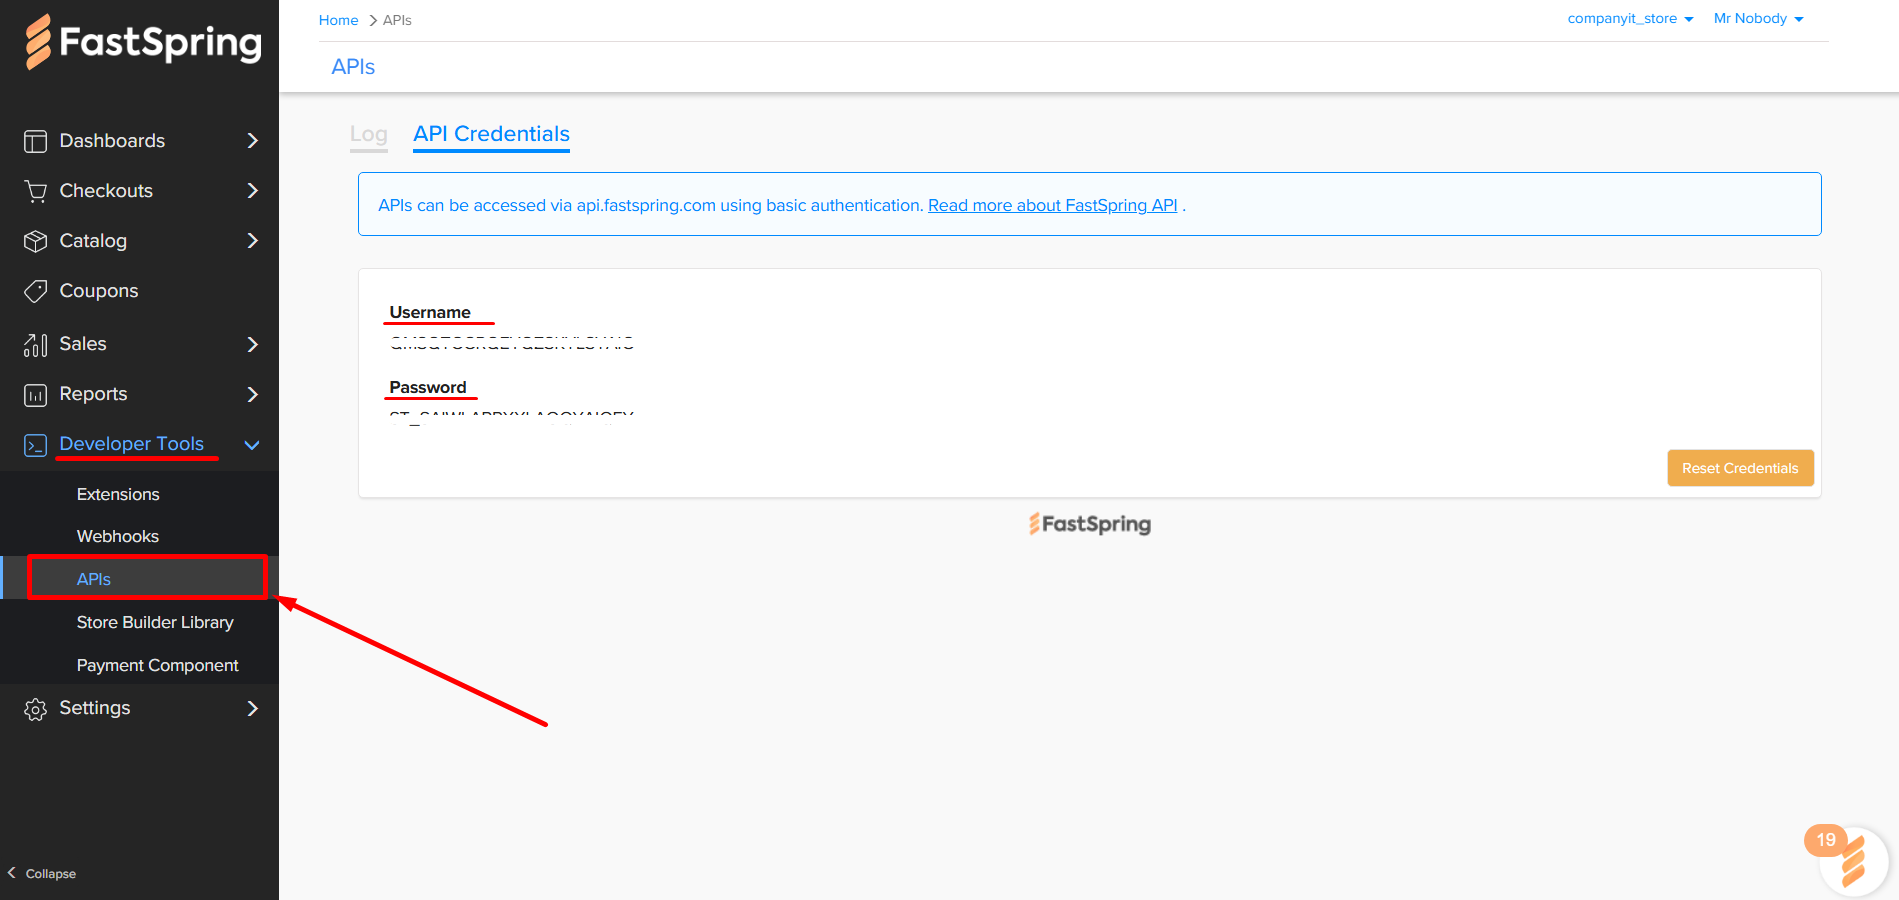
If it’s first time, then you’ll have to click the Create button to generate the credentials.

Copy the username and the password generated. Ensure you keep the credentials saved somewhere for later use.

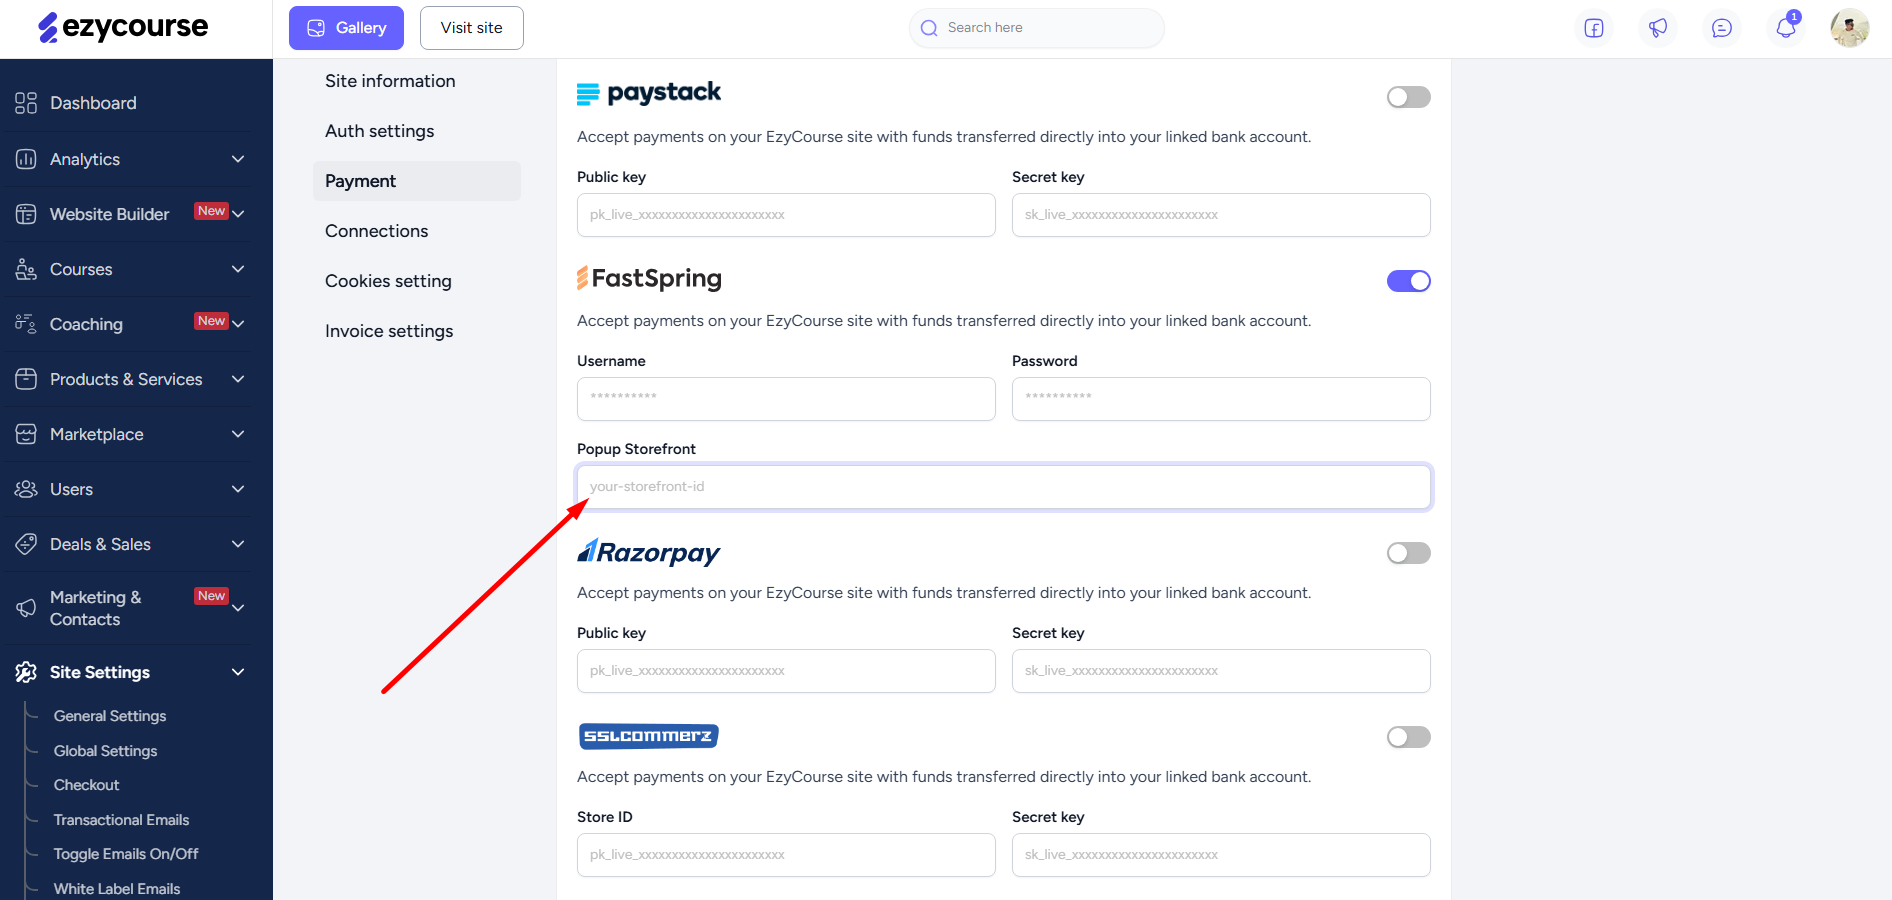
Step 3: Log in to your EzyCourse dashboard. Go to Site settings -> General Settings -> click on the Payment tab.
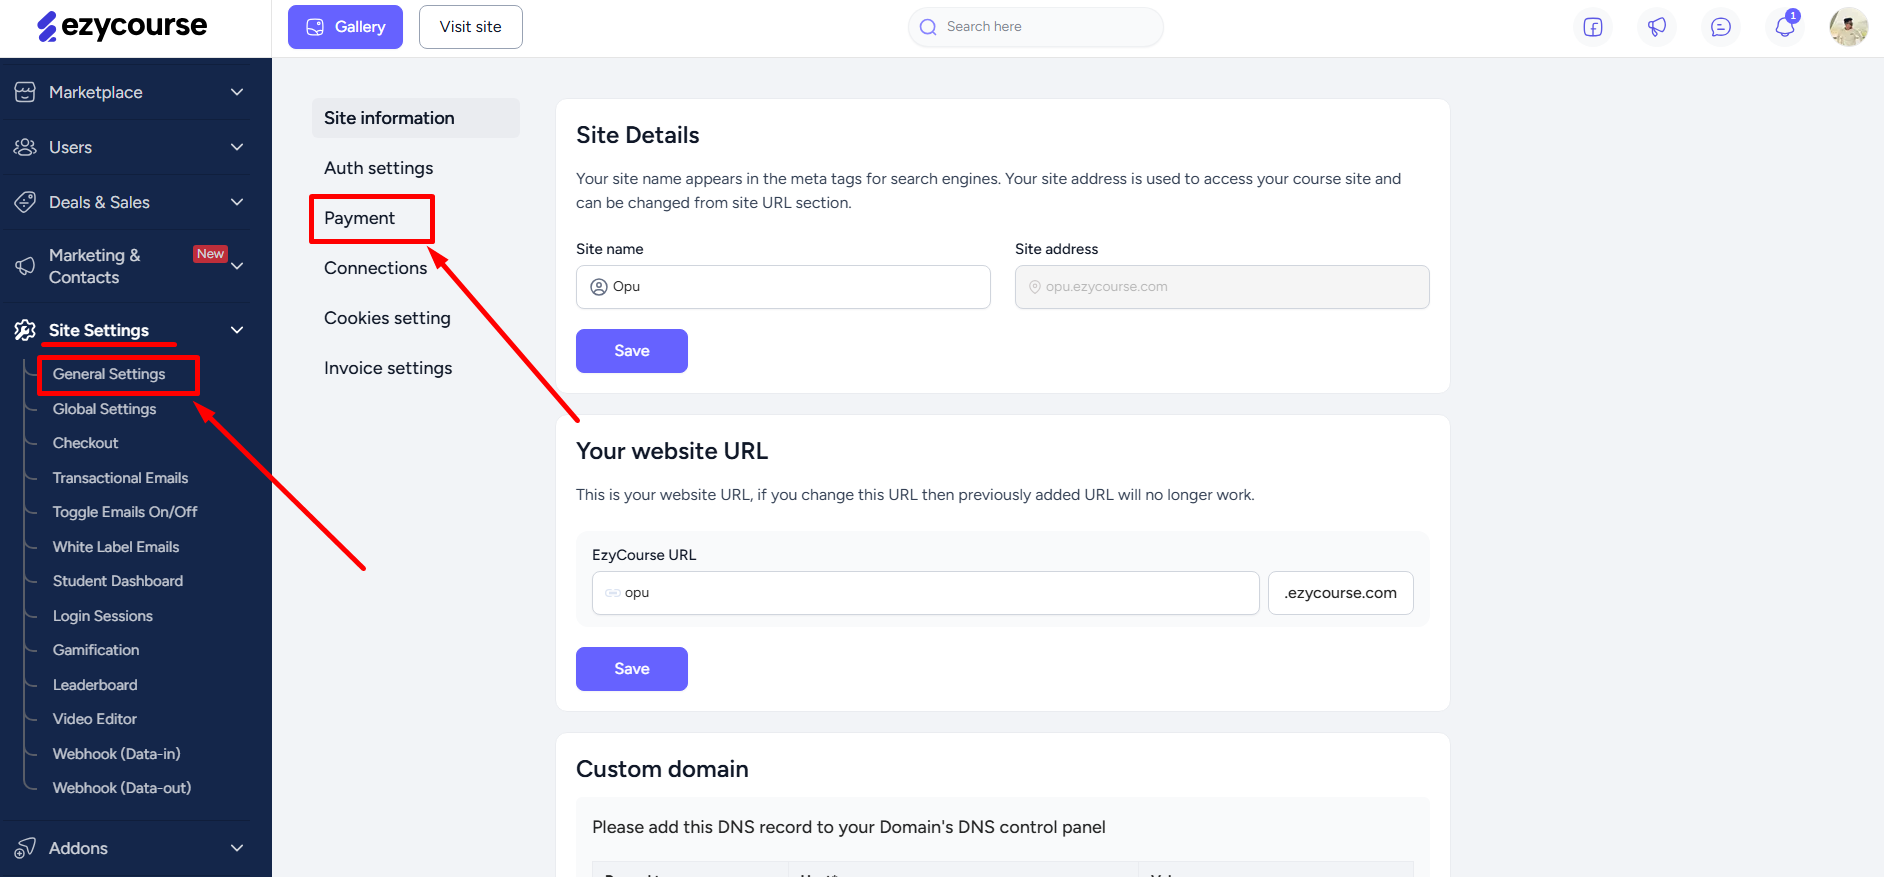
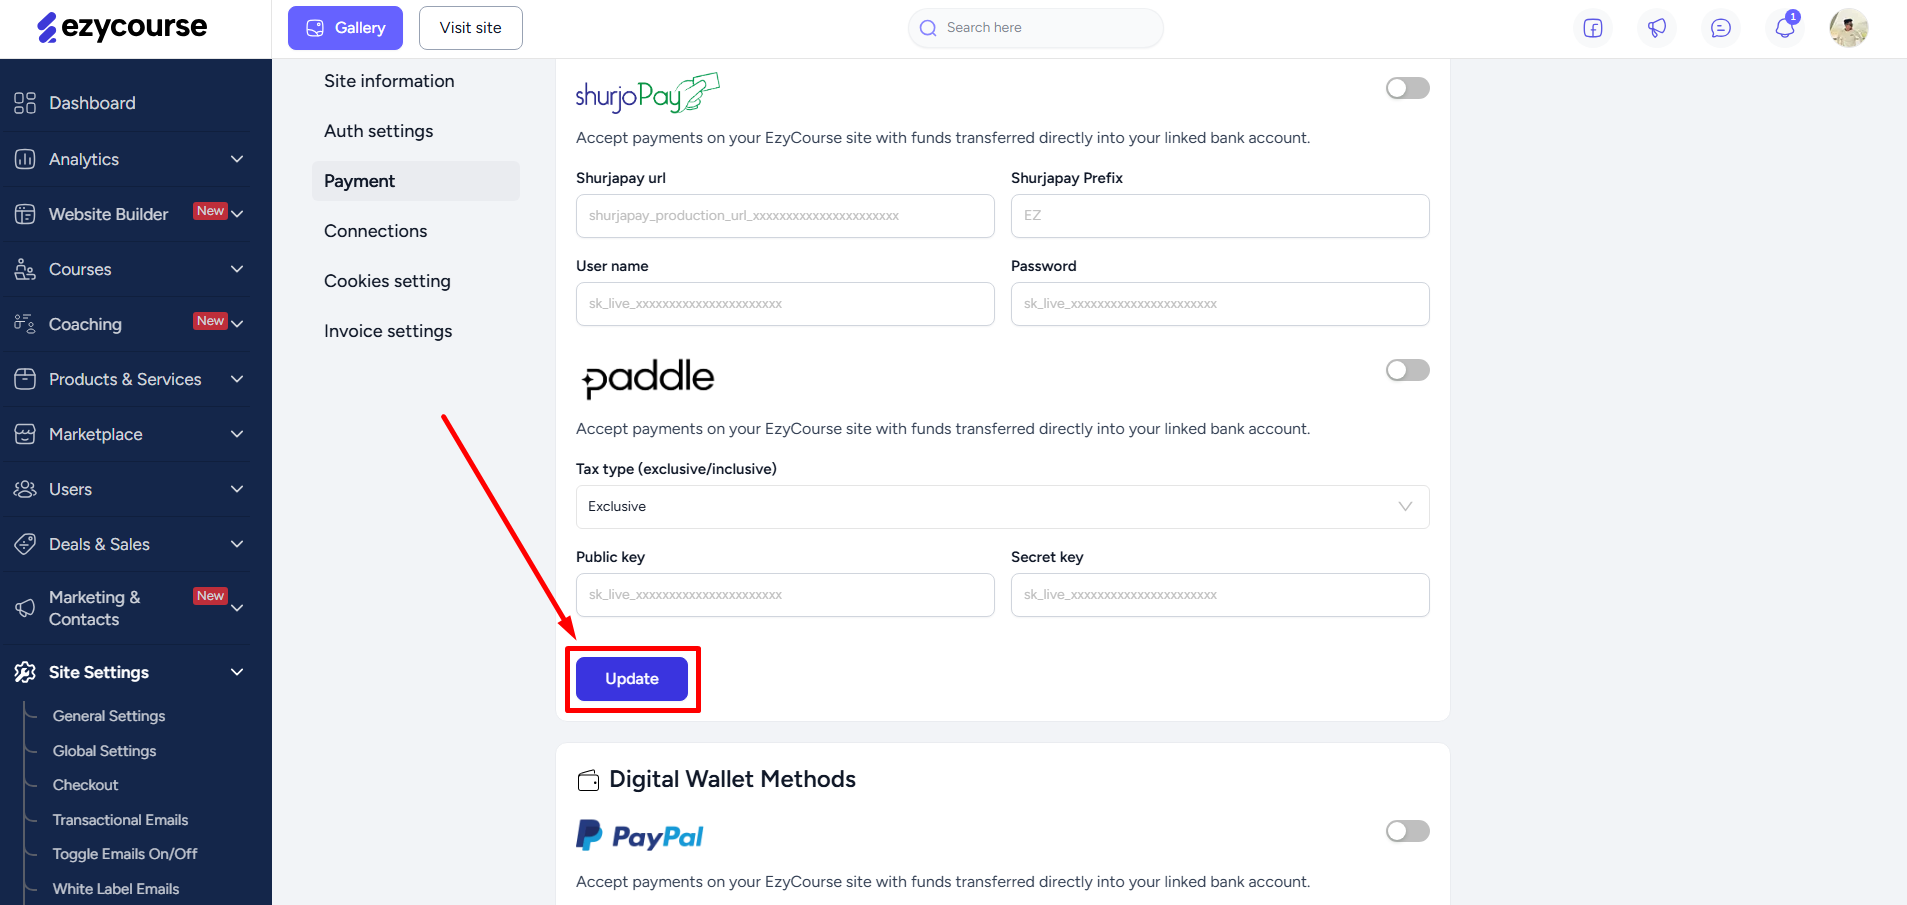
Now, scroll down to find the FastSpring option and paste the username and the password you copied from the FastSpring dashboard. And then enable the toggle button.

Scroll down and click the Update button to save the changes.
Step 4: Create your products on EzyCourse and set a pricing, and you will see that it will get added to the FastSpring dashboard under Catalog menu automatically. Depending on the pricing type (one-time, subscription, etc.), it will be added on that particular menu.
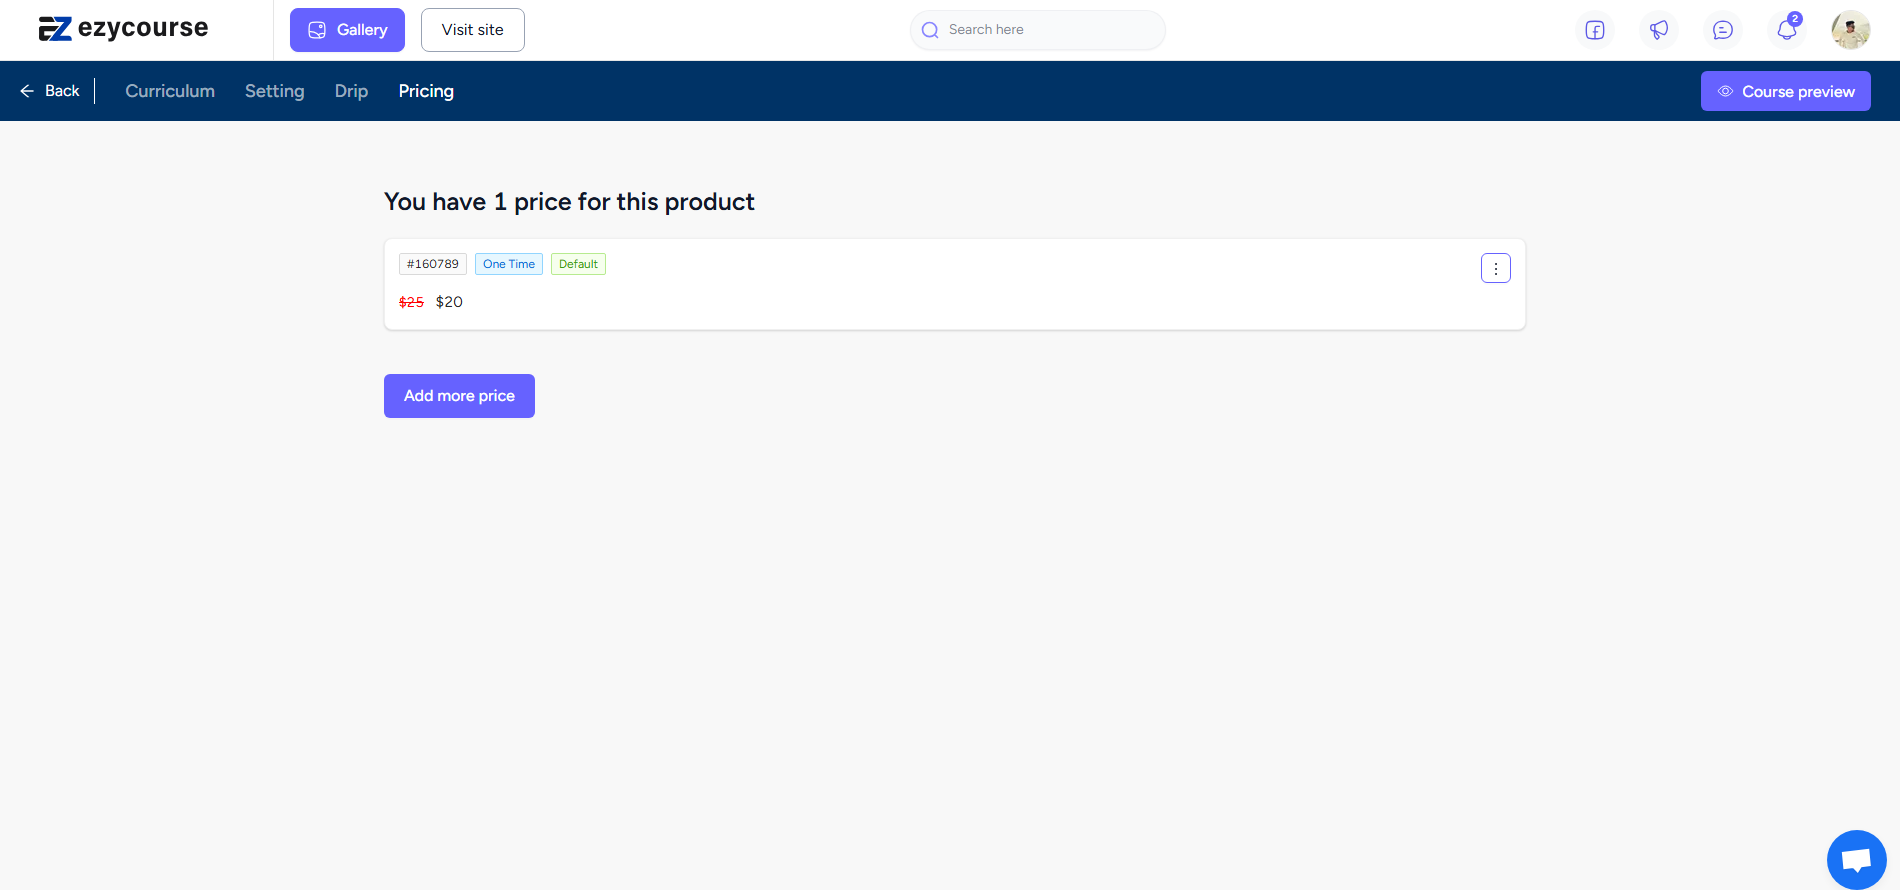

Step 5: Click on the product to see more details and find different settings including setting up Tax Category to the Product.


You’ll also find the product Checkout Links section. This section contains different options that let you test and see how your checkout will look or work.

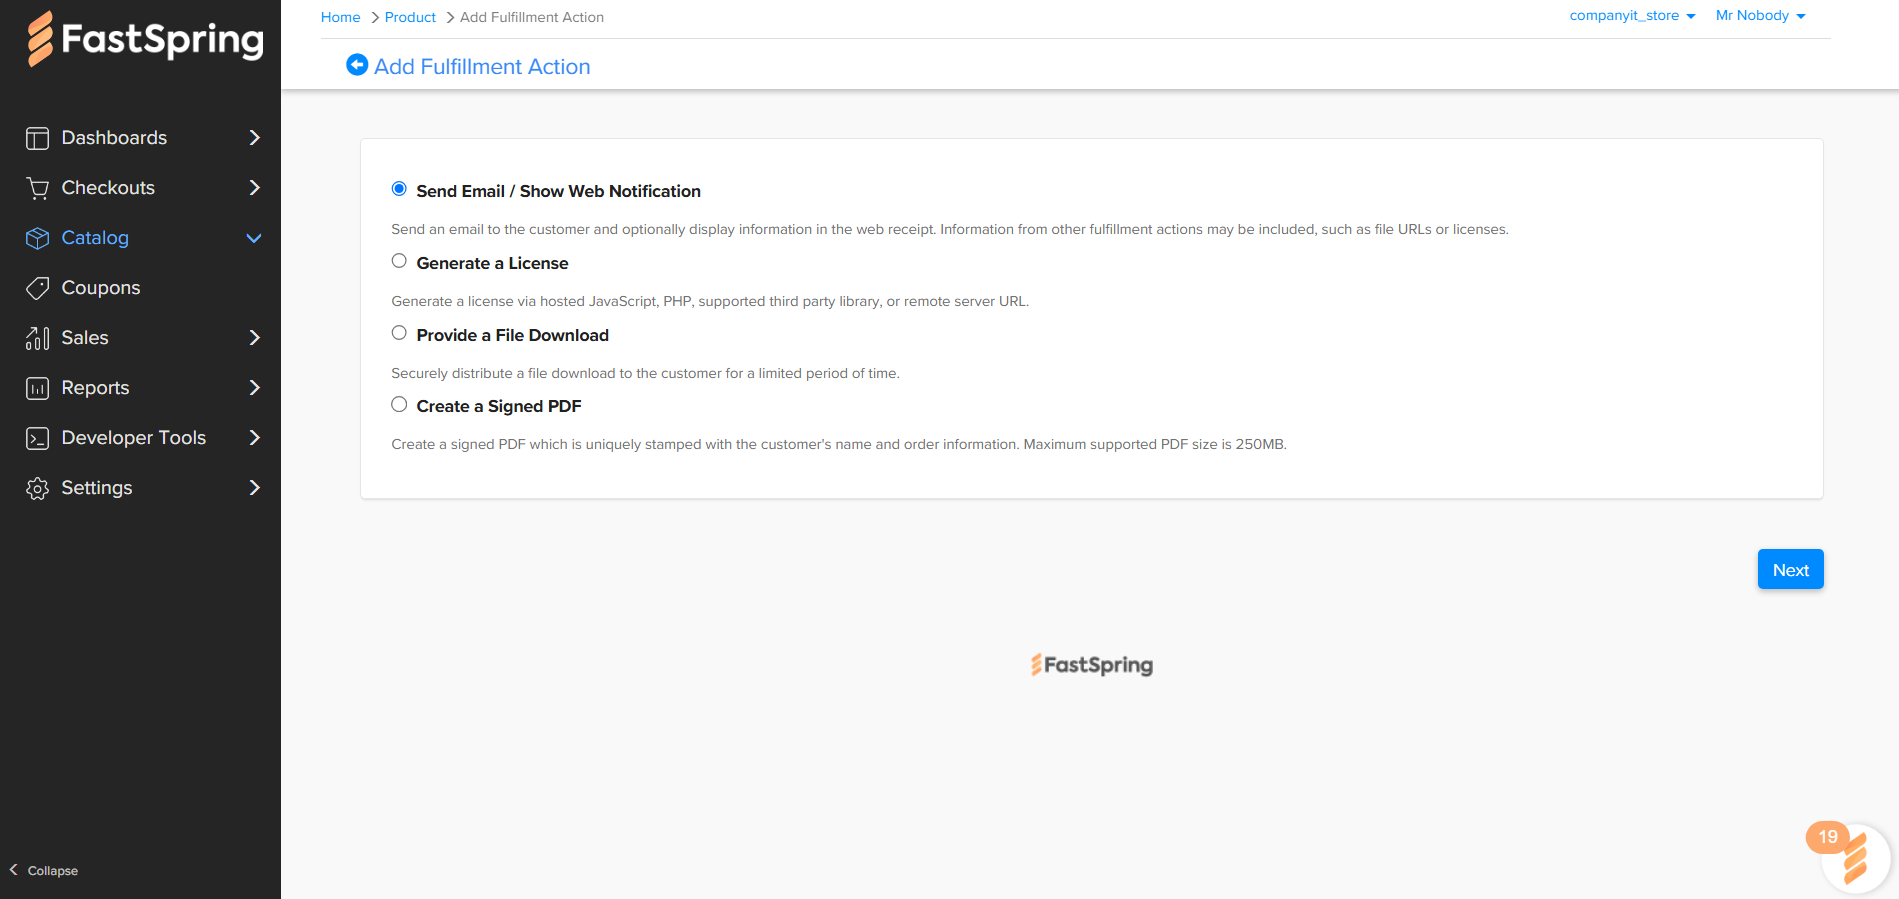
Step 6: Scroll down to see more settings. You can also set fulfillment, if necessary. For example, you can choose to send an email to your customers when they purchase any product.

Step 8: Once you set fulfillment, you will be able to switch your product online and activate your storefront. Add the storefront URL to the EzyCourse dashboard. To do that, go to Checkouts → Popup Checkouts → and then click the Place on your website button.
[Note: Storefront activation may take up to 48 hours for review.]

On the popup, copy the value of data-storefront property, which is the storefront URL.

Paste the URL on your EzyCourse dashboard FastSpring setting. Make sure you update to save the setting.
Step 9: You will need to whitelist your domain/sub-domains to start accepting live transactions. To do that, go to Checkouts → Popup Checkouts.

On the popup, list the domain/sub-domains of your website and click the Save button.

Step 10: Go to your Products checkout page and test FastSpring payment.

You’ll see the FastSpring checkout popup when you select the FastSpring option and click on Complete Purchase button.

Webhook Configuration
For recurring payments, you will need to configure webhooks. To set up a webhook, go to Developer Tools → Webhooks. And click the Add Webhook button on the top right corner of the screen.

On the popup, you can add the internal-facing title for the webhook. The dropdown is for defining when to receive webhook events from FastSpring. You can choose to receive for just tests, only for live, or both. Click the Add button to add the webhook.

With the webhook added, you can set the specific events related to subscription or recurring payments. To do that, click the Add URL Endpoint button.

On the popup, add this URL: “https://ezycourse.com/api/webhooks/fastspring/handle-events”. And from the events, select these two events: “subscription.charge.completed” and “subscription.deactivated”. And then click the Add button.

With the endpoint set, you can receive subscription or recurring fees without any issue.
