Back
Company-Specific Billing Info
What is it & why you need it
EzyCourse makes it convenient for your customers to add more than one billing address. This helps to calculate tax and VAT accurately. Besides, it makes the delivery process of physical products easier.
Now, you can allow “billing to company”, making it ideal for businesses to manage their purchases and tax records. It will make it simpler to track business expenses for your customers and will verify the legal status of the business since the company registration number will show on invoices.
This feature will help to increase the credibility and professionalism, and ultimately attract users with businesses to your platform.
How it works
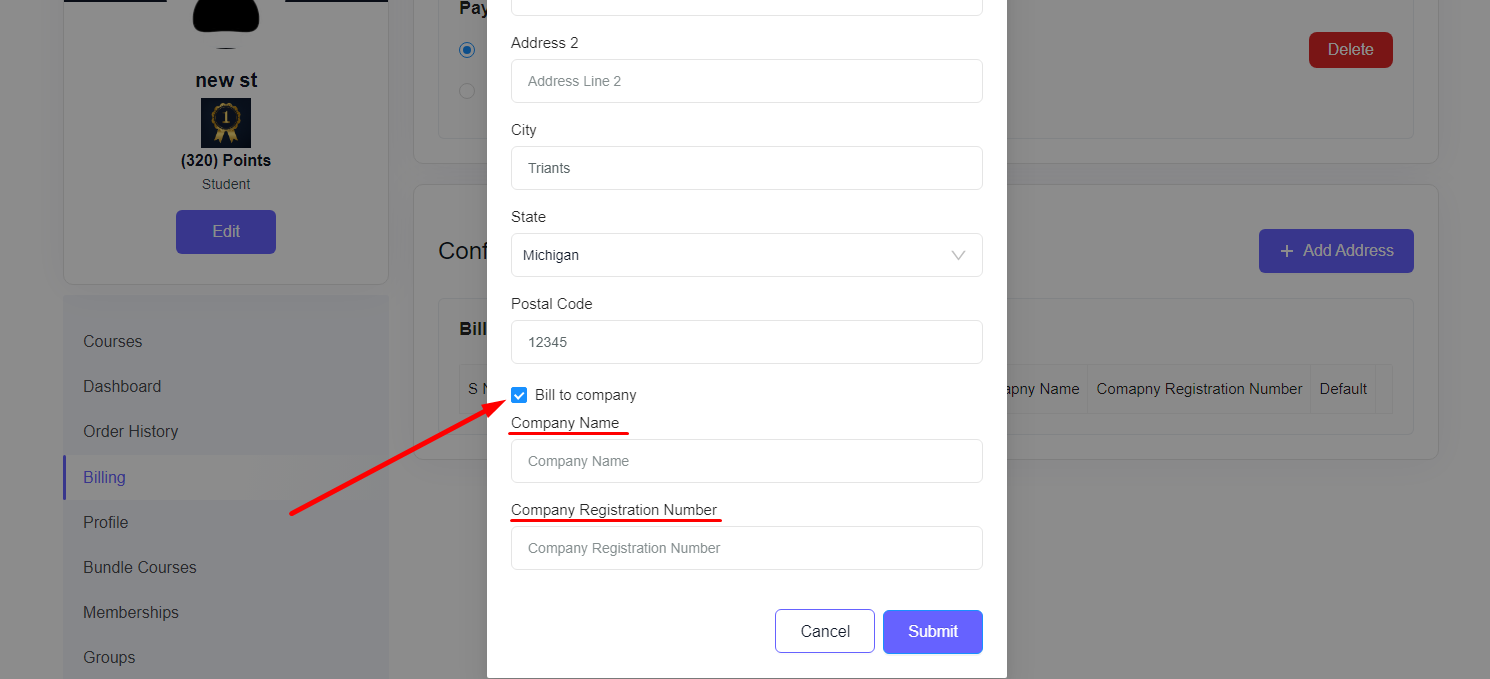
Your users can choose to set up their business or company billing. There are two additional fields for company billing, Company Name and Company Registration Number.
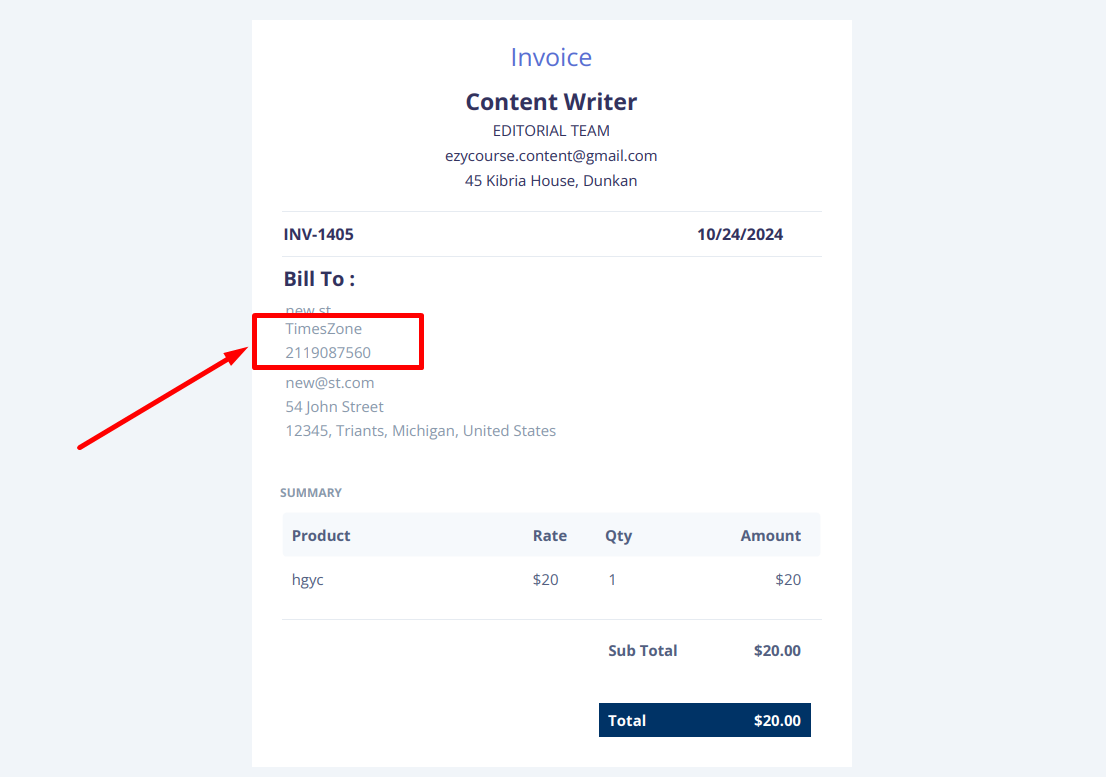
If they choose a billing address with company billing to purchase any product then the info will appear on the invoice. As an admin, you can view the company billing info from your dashboard by downloading the invoice too.
How to get started using it
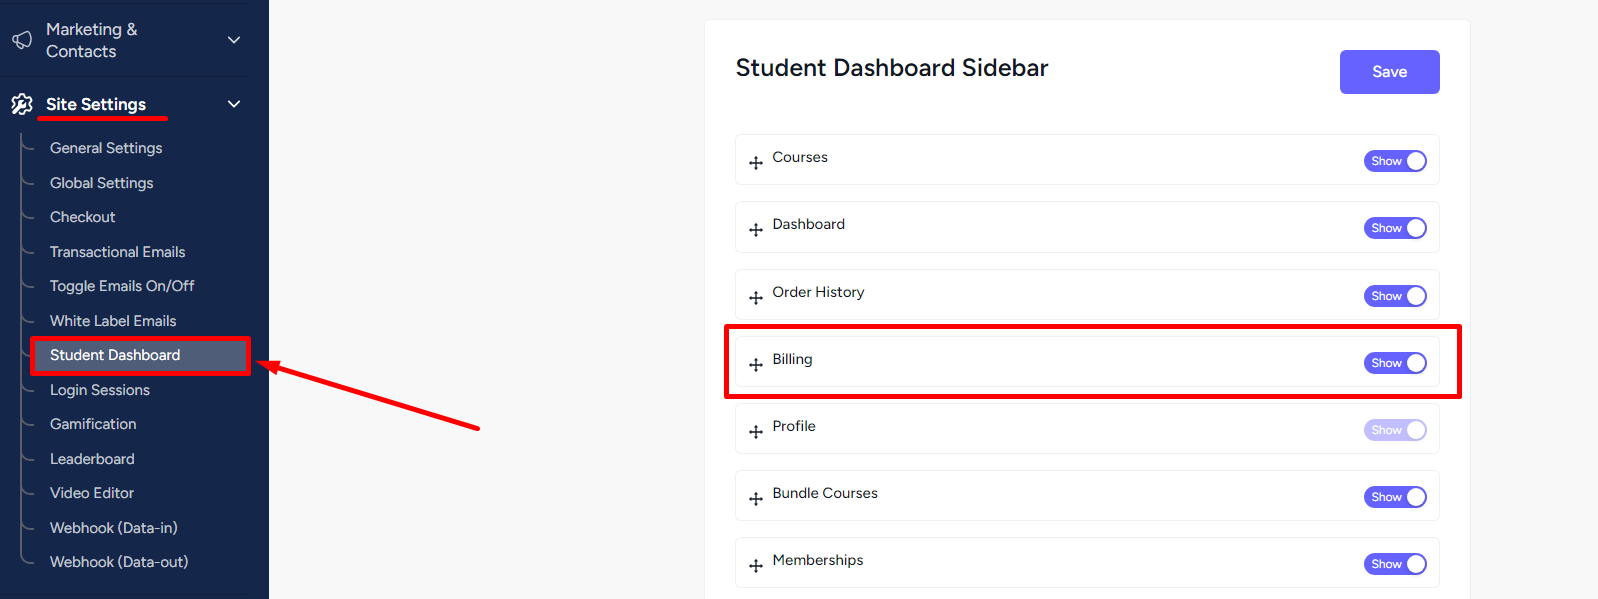
To allow users add their billing address, first enable the Billing menu on the student dashboard. To do that, log in to your EzyCourse dashboard and go to Site Settings -> Student Dashboard.
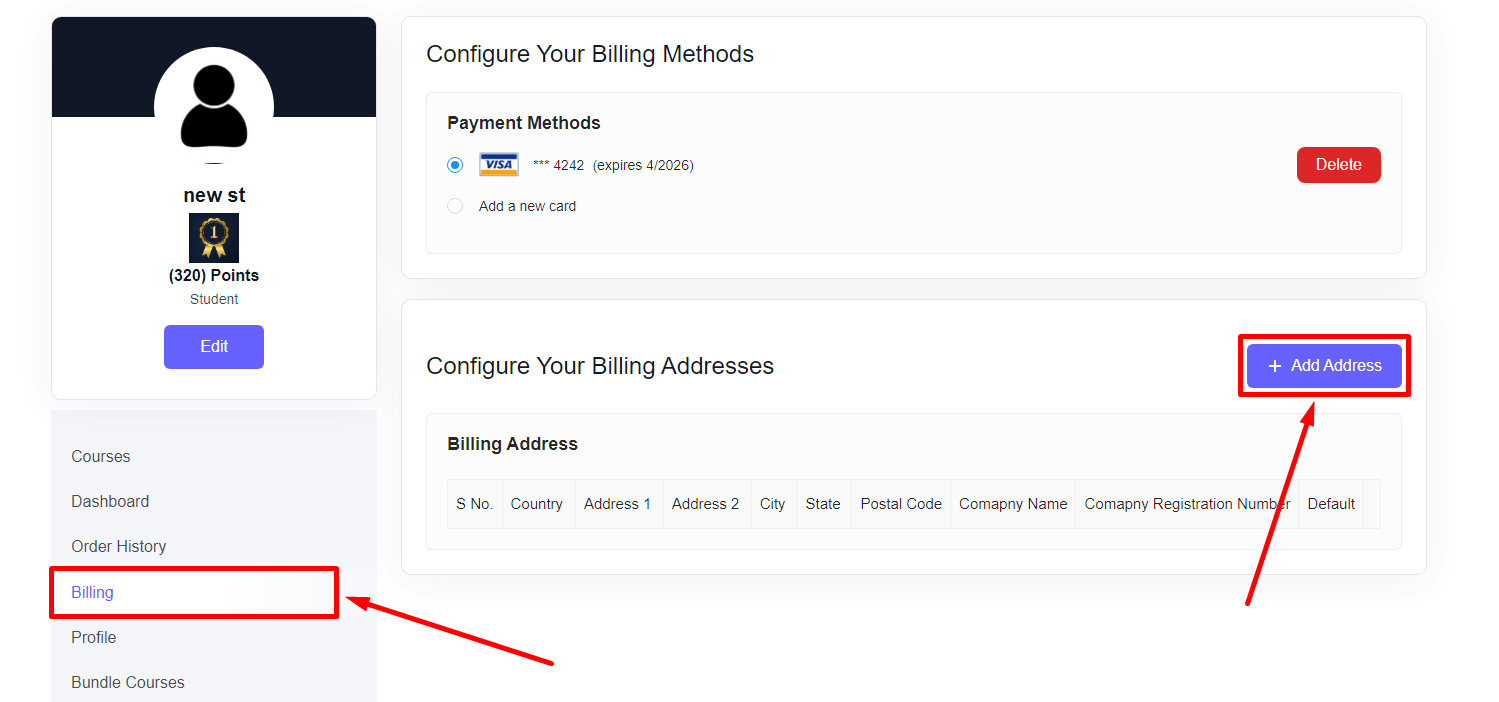
On the student-end, they can add a new billing address from the Billing menu.
Here, they can enable the “Bill to company” option to input their company name and registration number.
With the billing address added, your customers can go on to use the address on the checkout page.
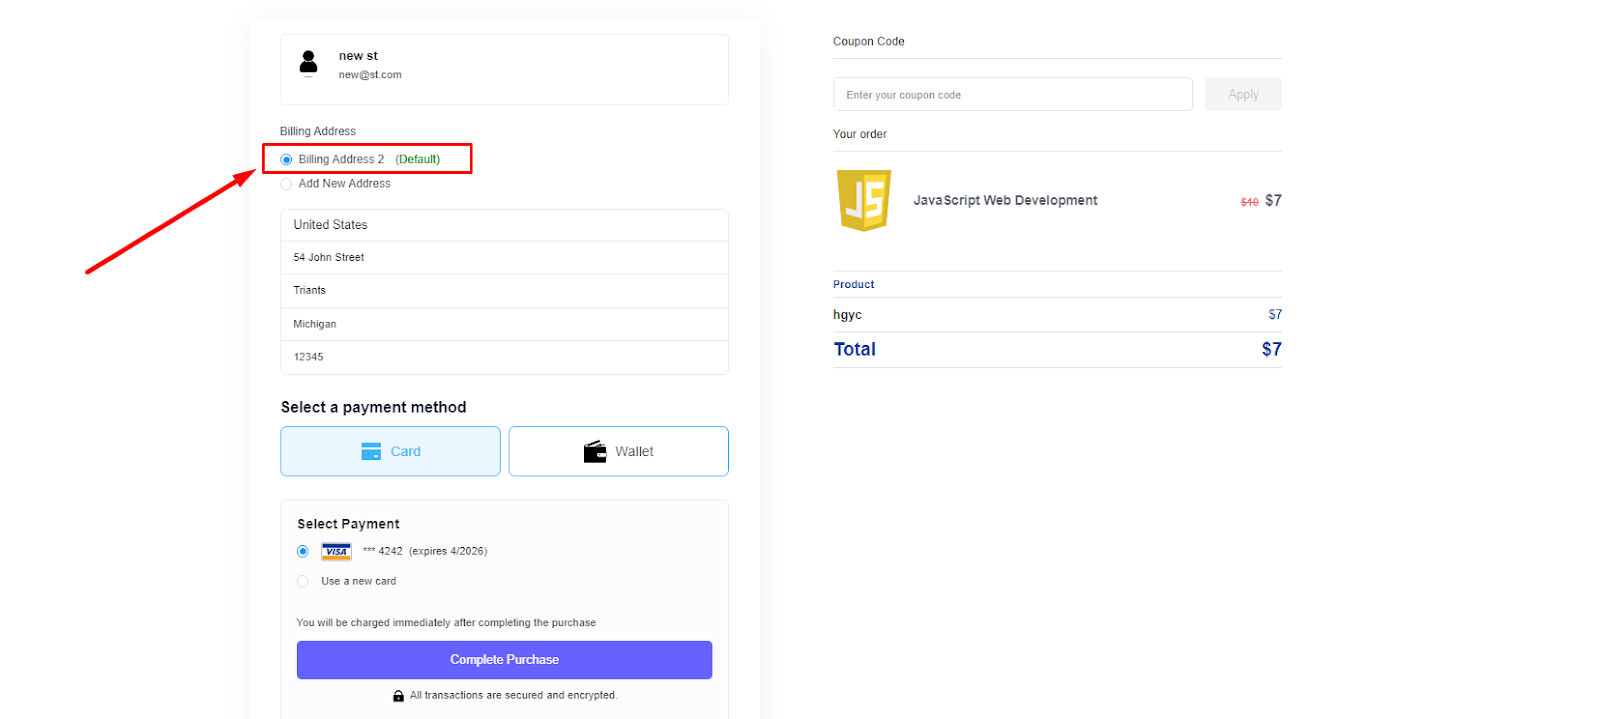
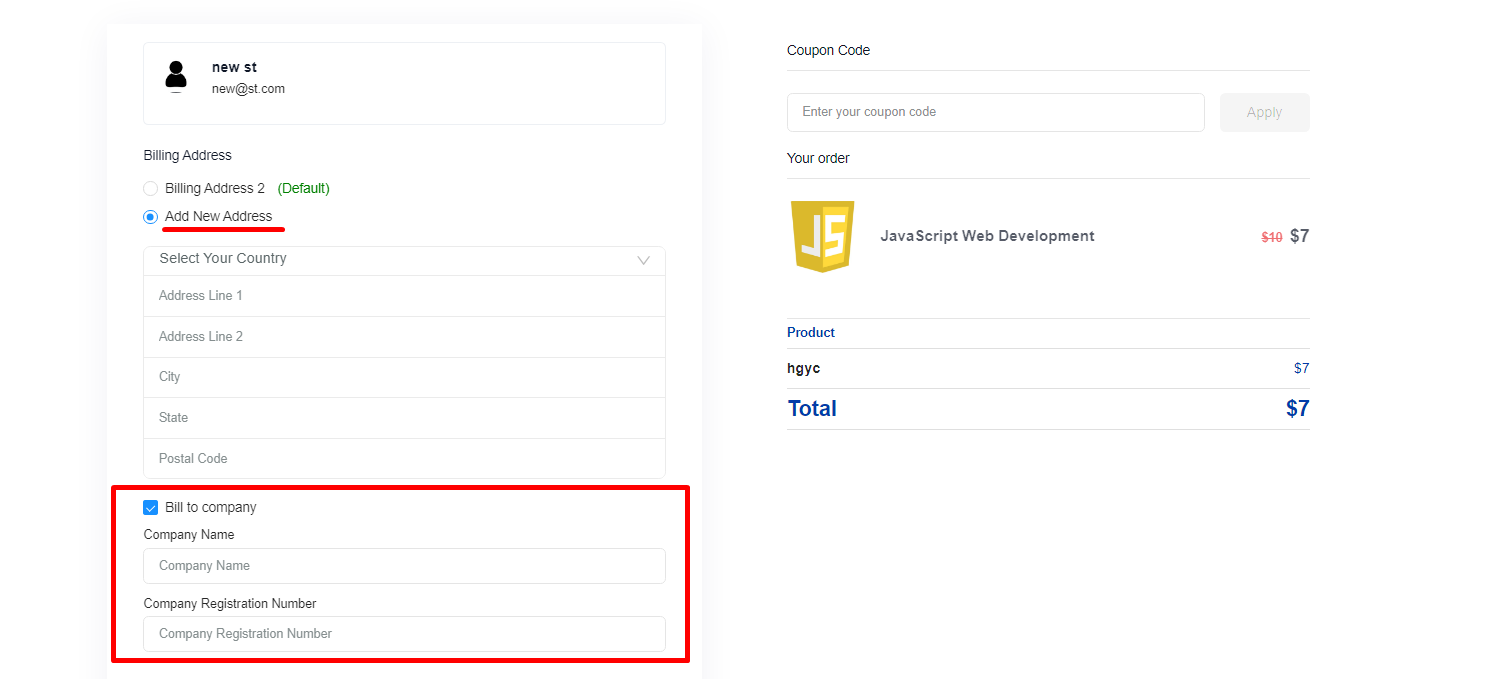
Notice that when an existing address is selected, it will not show the company billing info on the checkout page. But, the info will still appear on the invoice if purchase is made with the existing address. Also, if the user chooses to add a new address on the checkout then they can see the two company-specific fields.
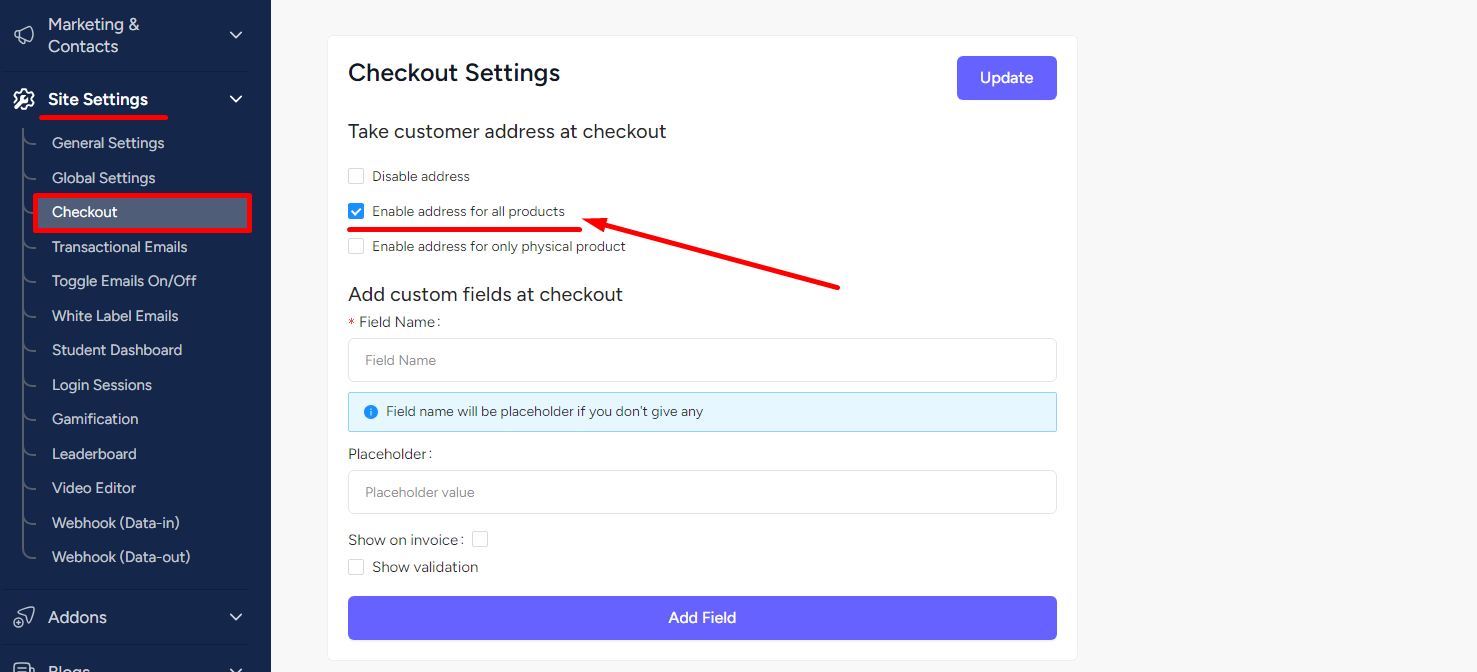
Ensure you have the right settings enabled on your admin dashboard to allow customers to use their billing address on the checkout page. To do that, enable the “address for all products” option from Site Settings -> Checkout menu.
After purchasing a product with company billing, the company name and registration number will show on the invoice along with other address details.
