Back
New Community UI & Tab Settings
What is it & why you need it
You can easily create communities and increase student engagement on your platform. EzyCourse provides a facebook-like community interface where your students feel right at home.
Now, you have a new user interface with a more modern look and more functions for you to make use of. The community is more organized and interacting in the community through discussions, comments, etc. will become more fun for your students.
In addition to the new interface, you can also make use of tab settings from now, making your communities organized and much easier to navigate to different sections such as saved posts, videos, photos, etc. You can even show relevant courses and let students join upcoming events directly from the community.
How it works
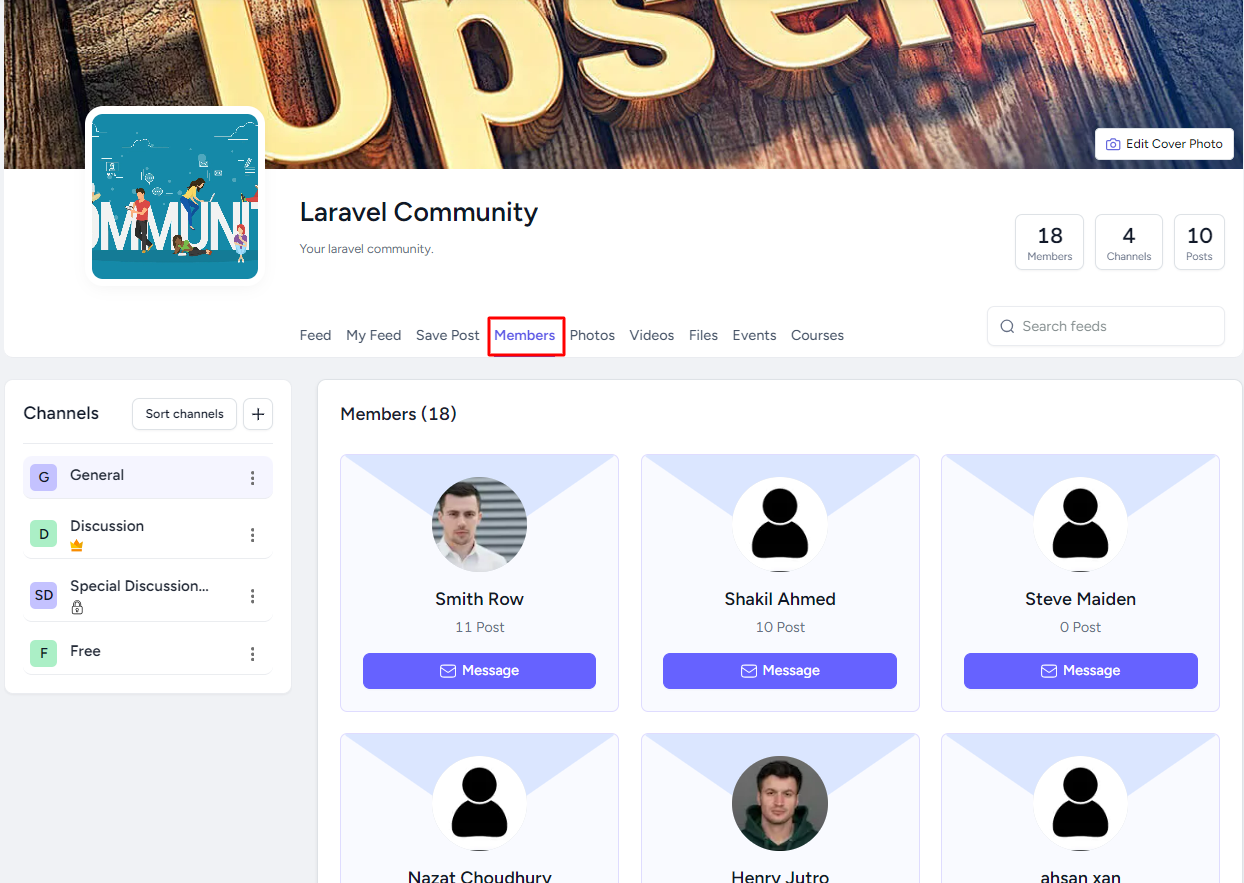
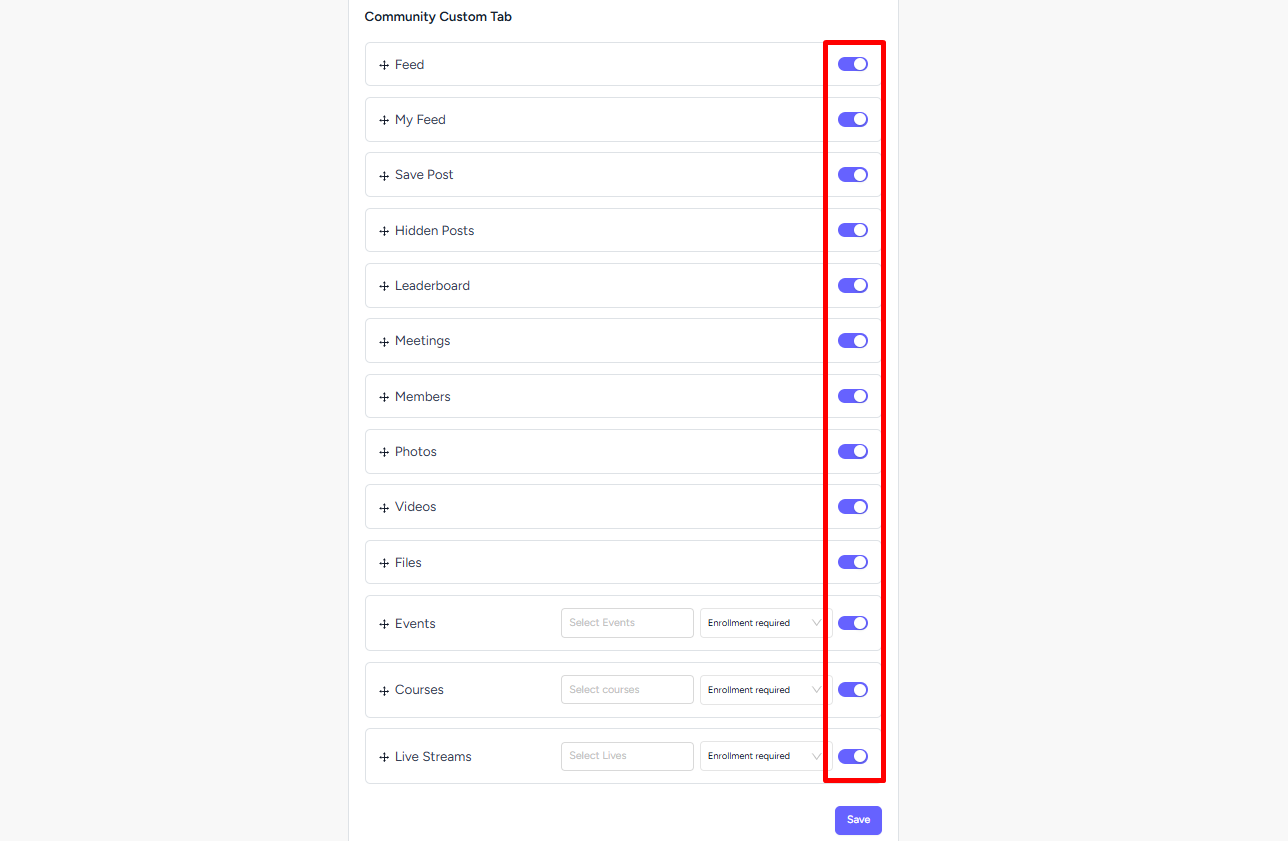
As an admin, you have access to a new feature for your communities called “tab settings“. With it, you can choose to show or hide certain tabs at the top of the community so that it is easier to navigate and everything remains organized. The tabs are -
• Feed: Shows the main feed of the community channel.
• My Feed: Shows only the feed/posts of the student who is viewing the community.
• Save Post: Shows the posts that were saved by the student.
• Hidden Posts: Shows the posts that were hidden by the student.
• Leaderboard: Shows all the students listed in the ranking list.
• Meetings: Shows all the meetings scheduled in the community.
• Members: Shows all the members in the community.
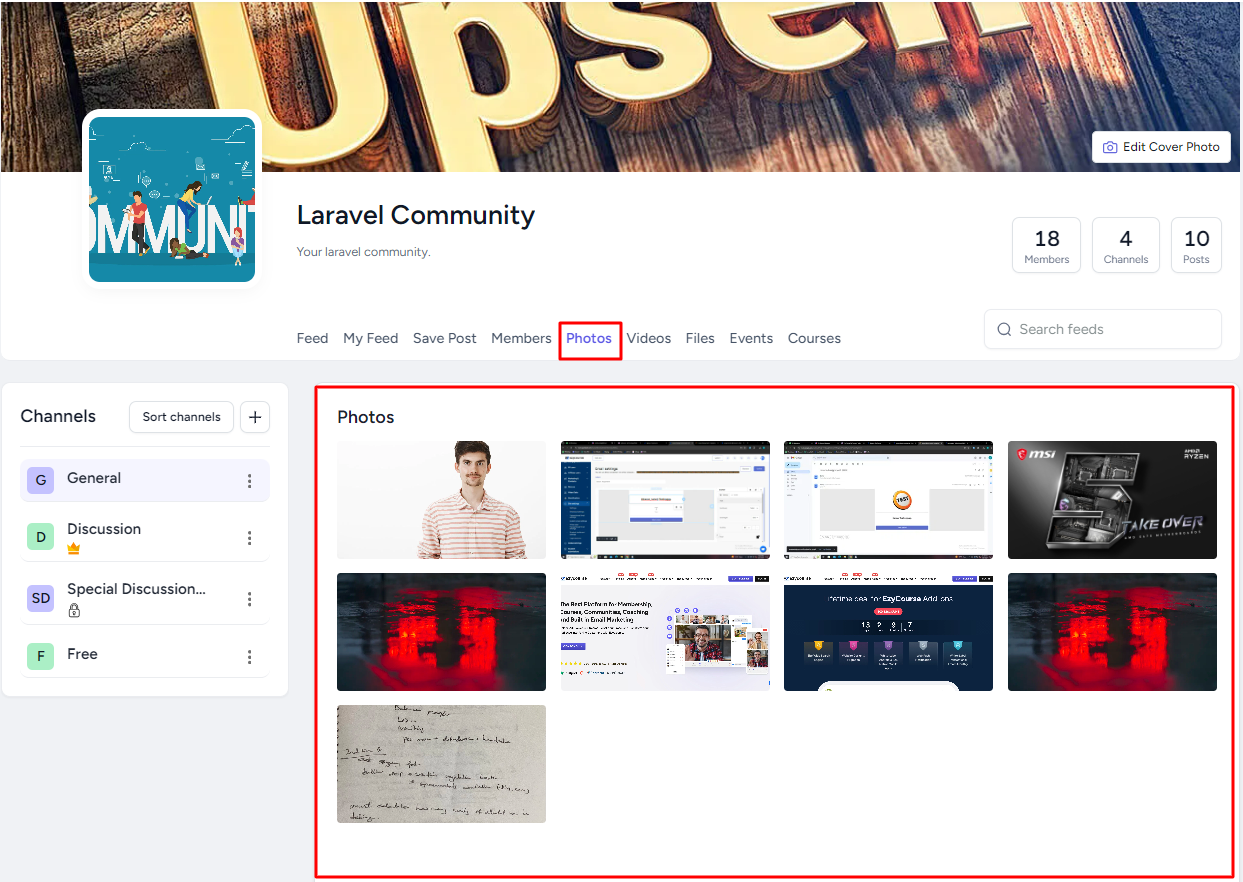
• Photos: Shows all the images posted in the community.
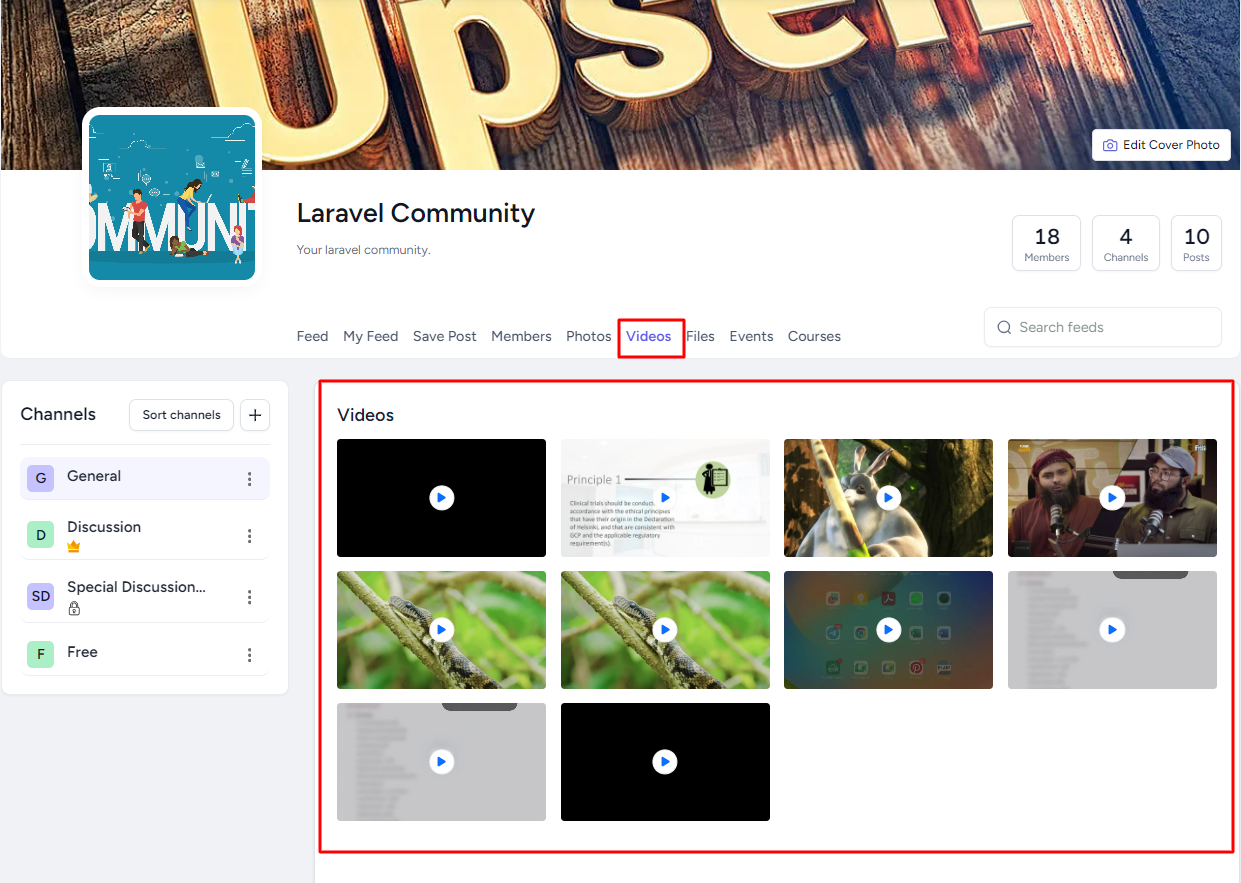
• Videos: Shows all the videos posted in the community.
• Files: Shows all the files uploaded in the community.
• Events: Shows only the events you select from the community tab settings on your dashboard.
• Courses: Shows only the courses you select from the community tab settings on your dashboard.
• Live Streams: Shows only the live streams you select from the community tab settings on your dashboard.
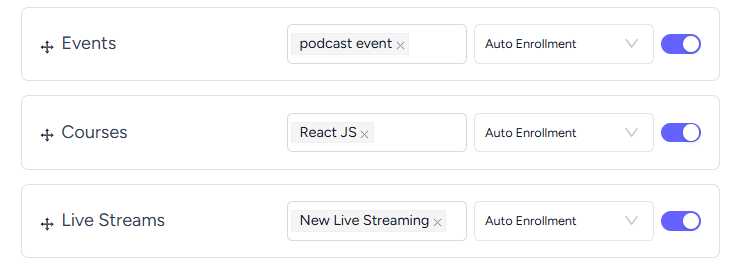
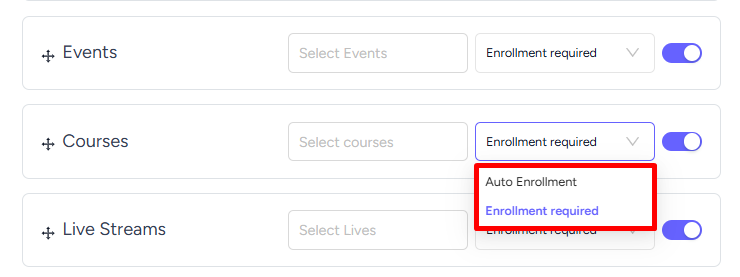
The Events, Courses, and Live Streams are the tabs you can use to show only the event, course, or live stream you select from the community tab settings on your dashboard. You can show multiple events, courses, or live streams on the respective tab. From these tabs, you can set the setting to either “Auto Enrollment” or “Enrollment required“. This determines whether the students in the community can directly get enrolled to the events/courses/live streams from these tabs.
How to get started using it
Step 1: To enable new tabs, first of all, you have to go to Products & Services > Communities.
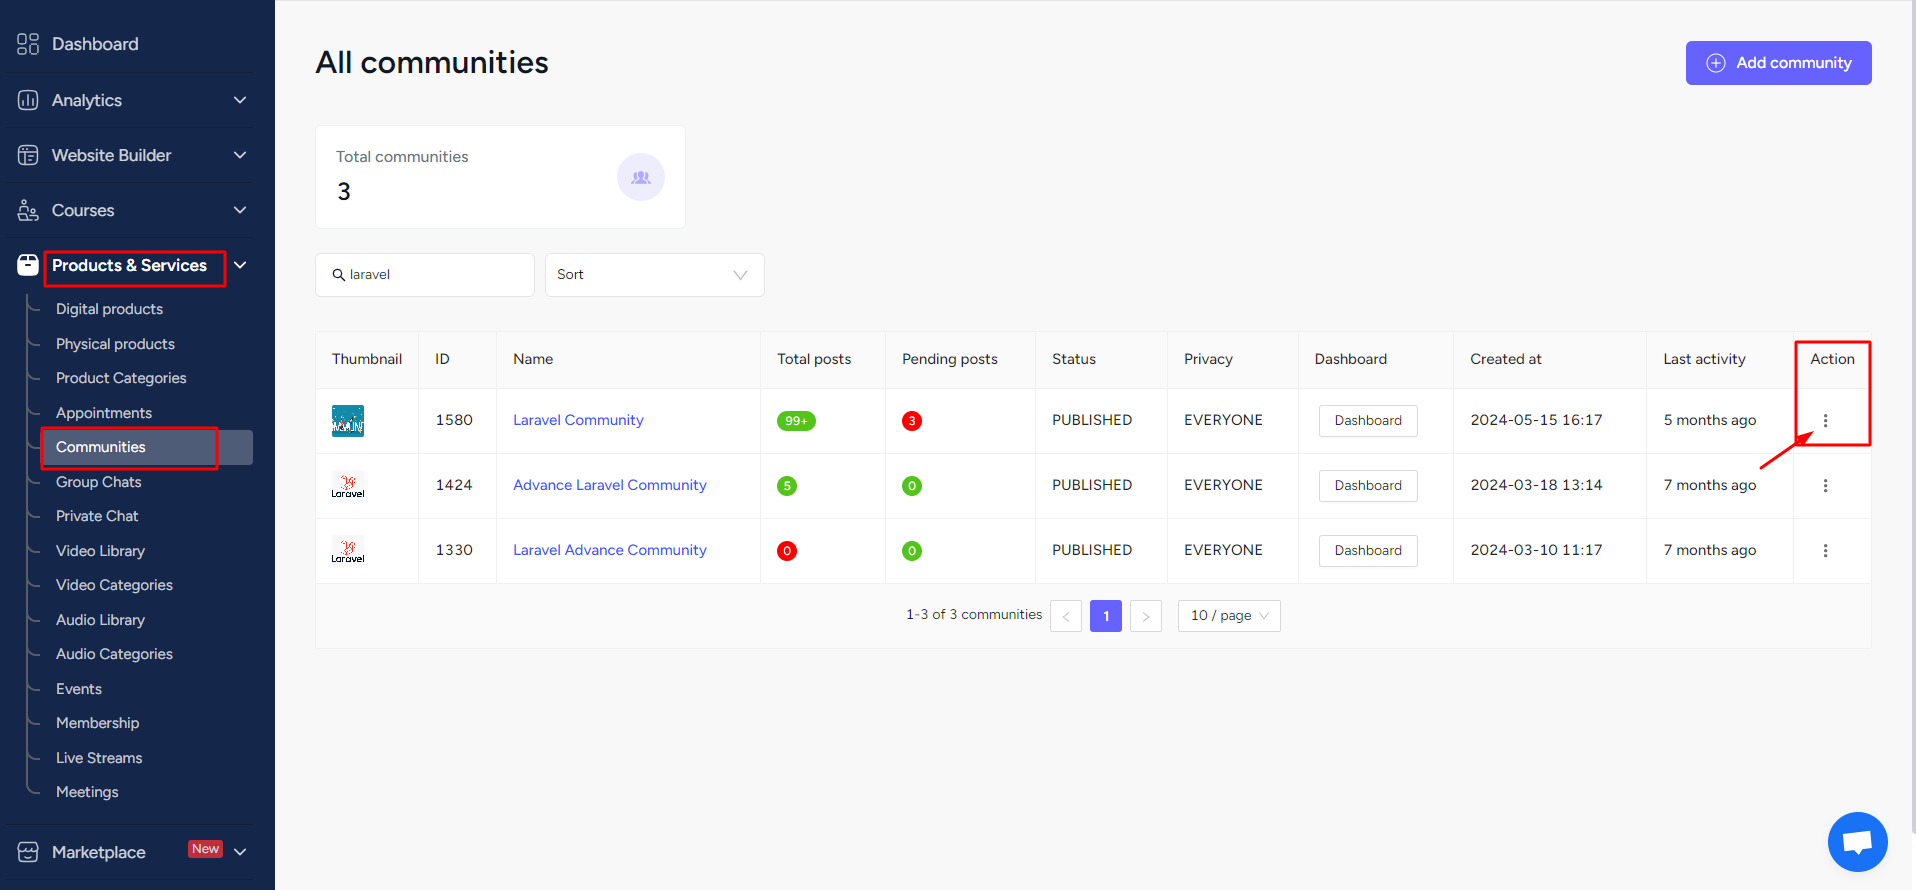
Step 2: Click on Action > Tab Settings

Step 3: From here, you can enable the tabs.
Step 4: You can select events and courses as you want. Also, there are two types of enrollment. Auto Enrollment enrolls the student directly from the community. And selecting Enrollment required will need your students to purchase the product, and they’ll be redirected to the product checkout page from the community.
New User Interface of the Community Feed
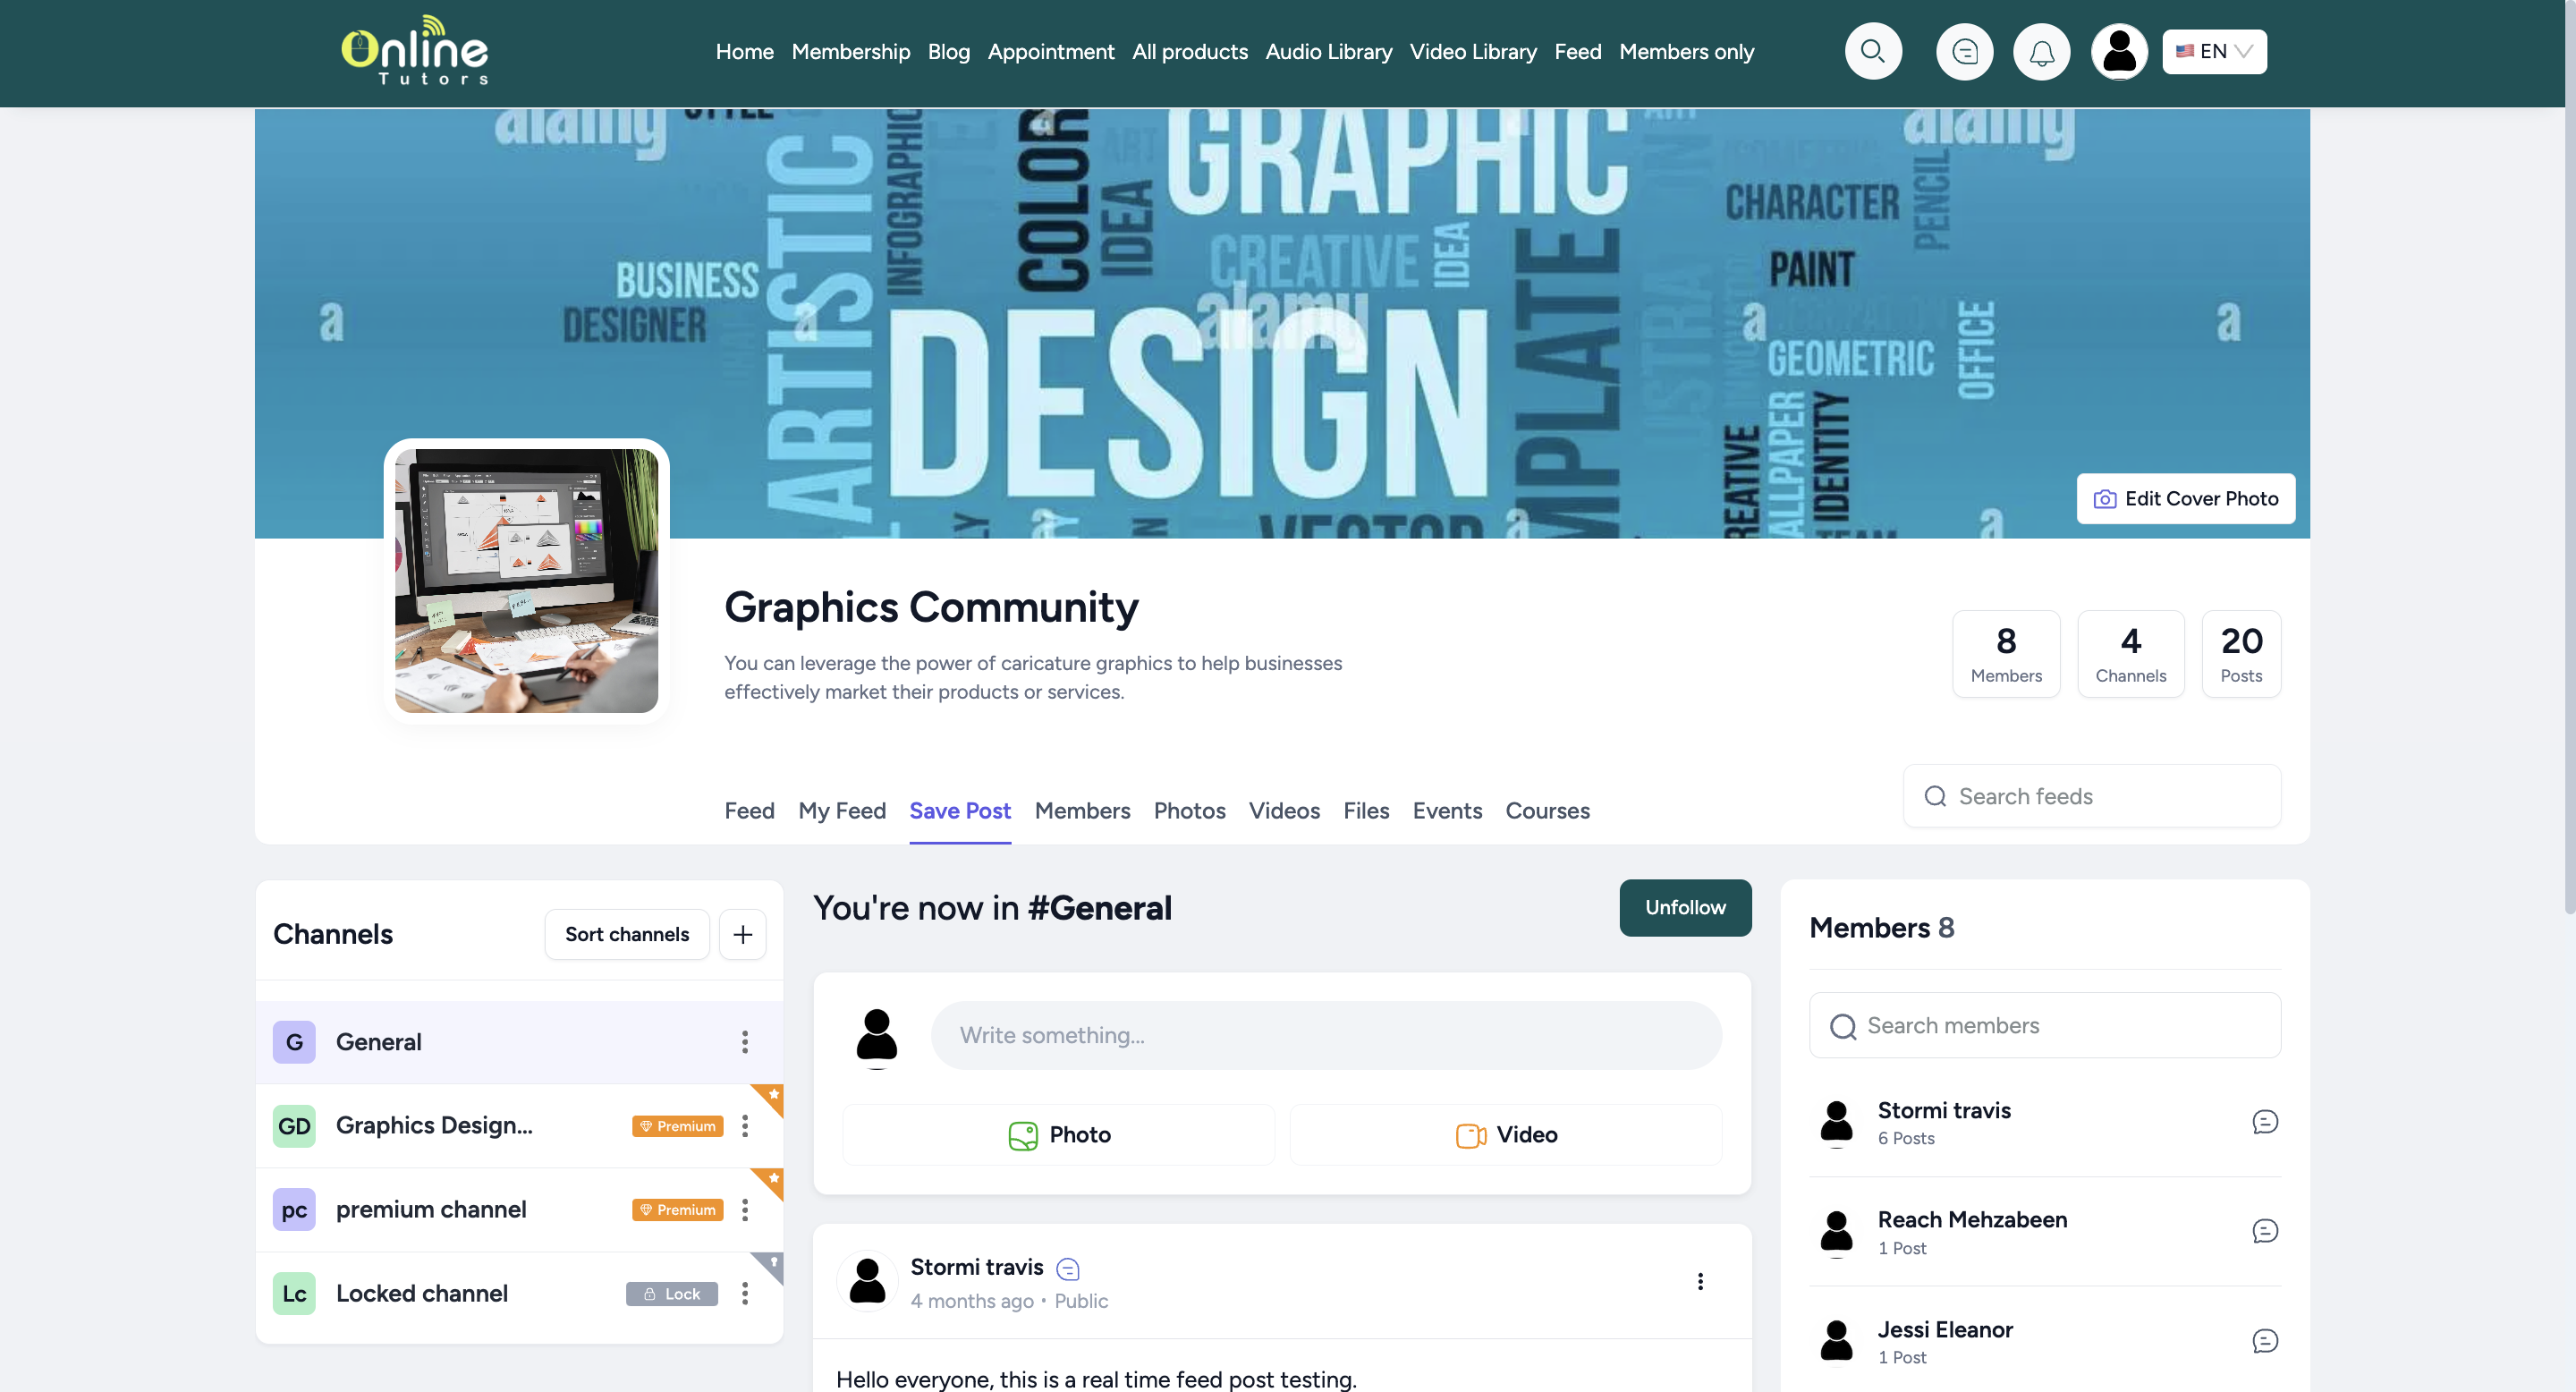
So, let’s see the fresh-looking interface of a community. Here you can see multiple tabs and the brand new design of the community feed.
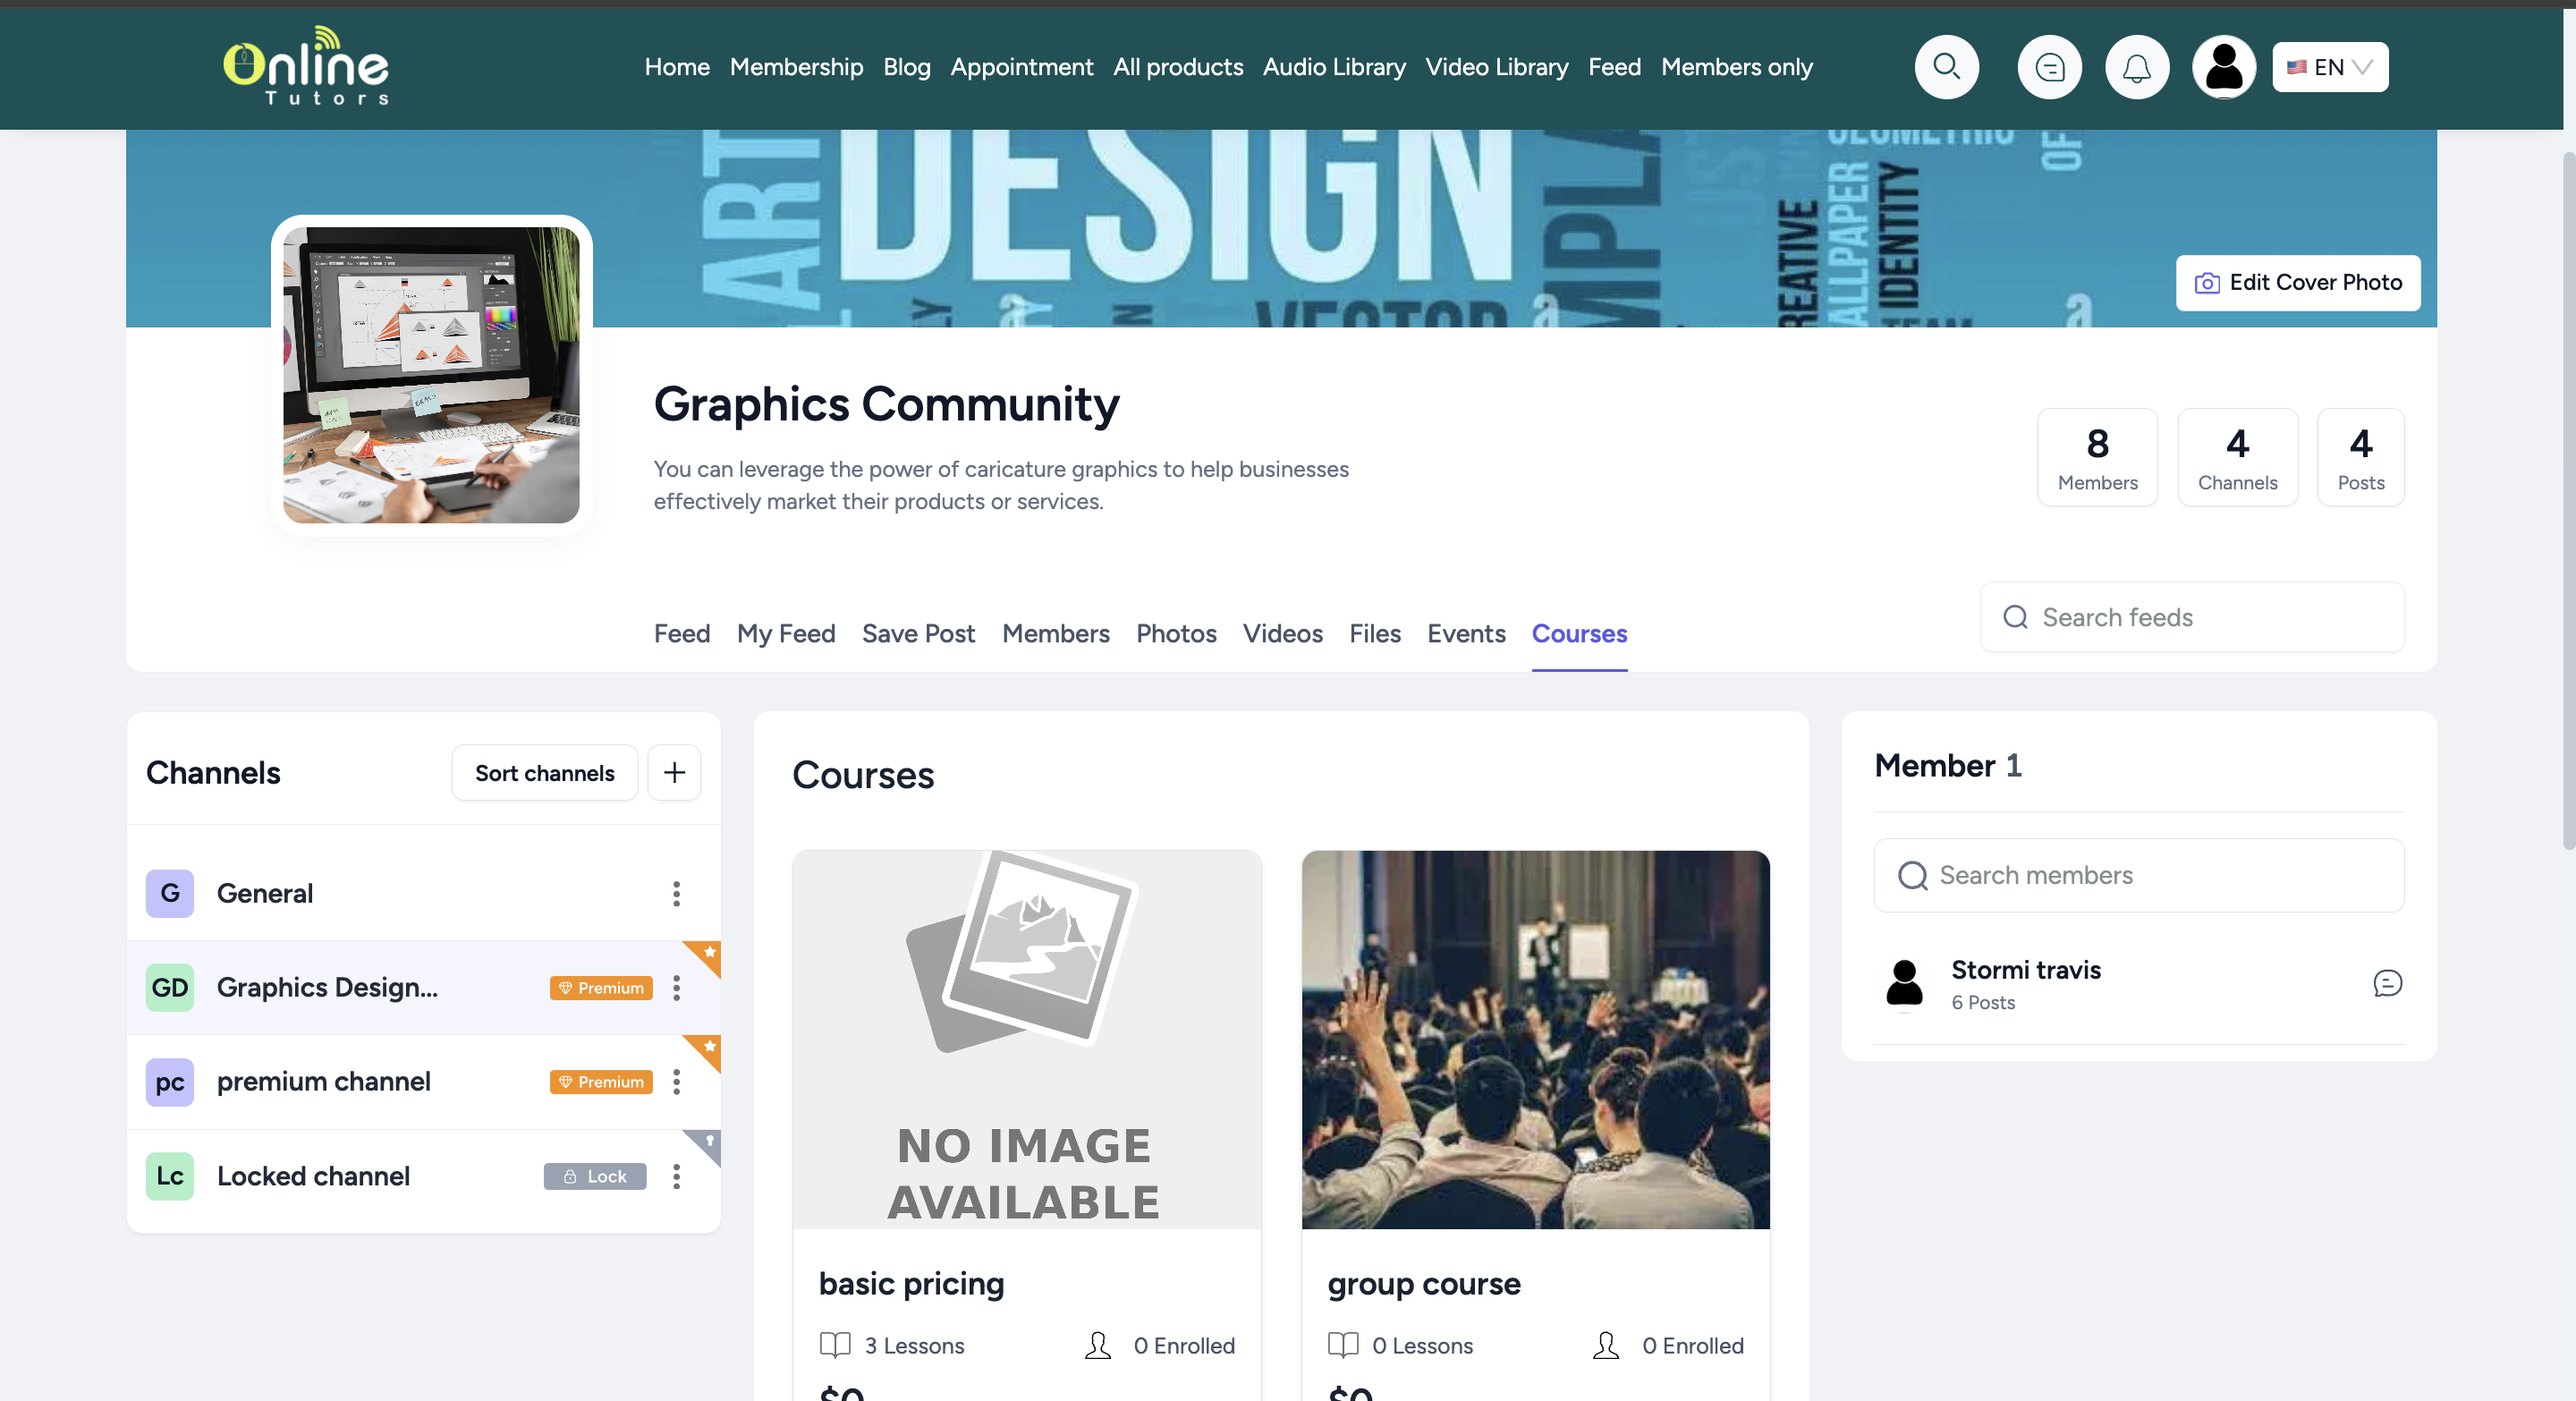
Let’s see how you can showcase any selected courses on the community feed.
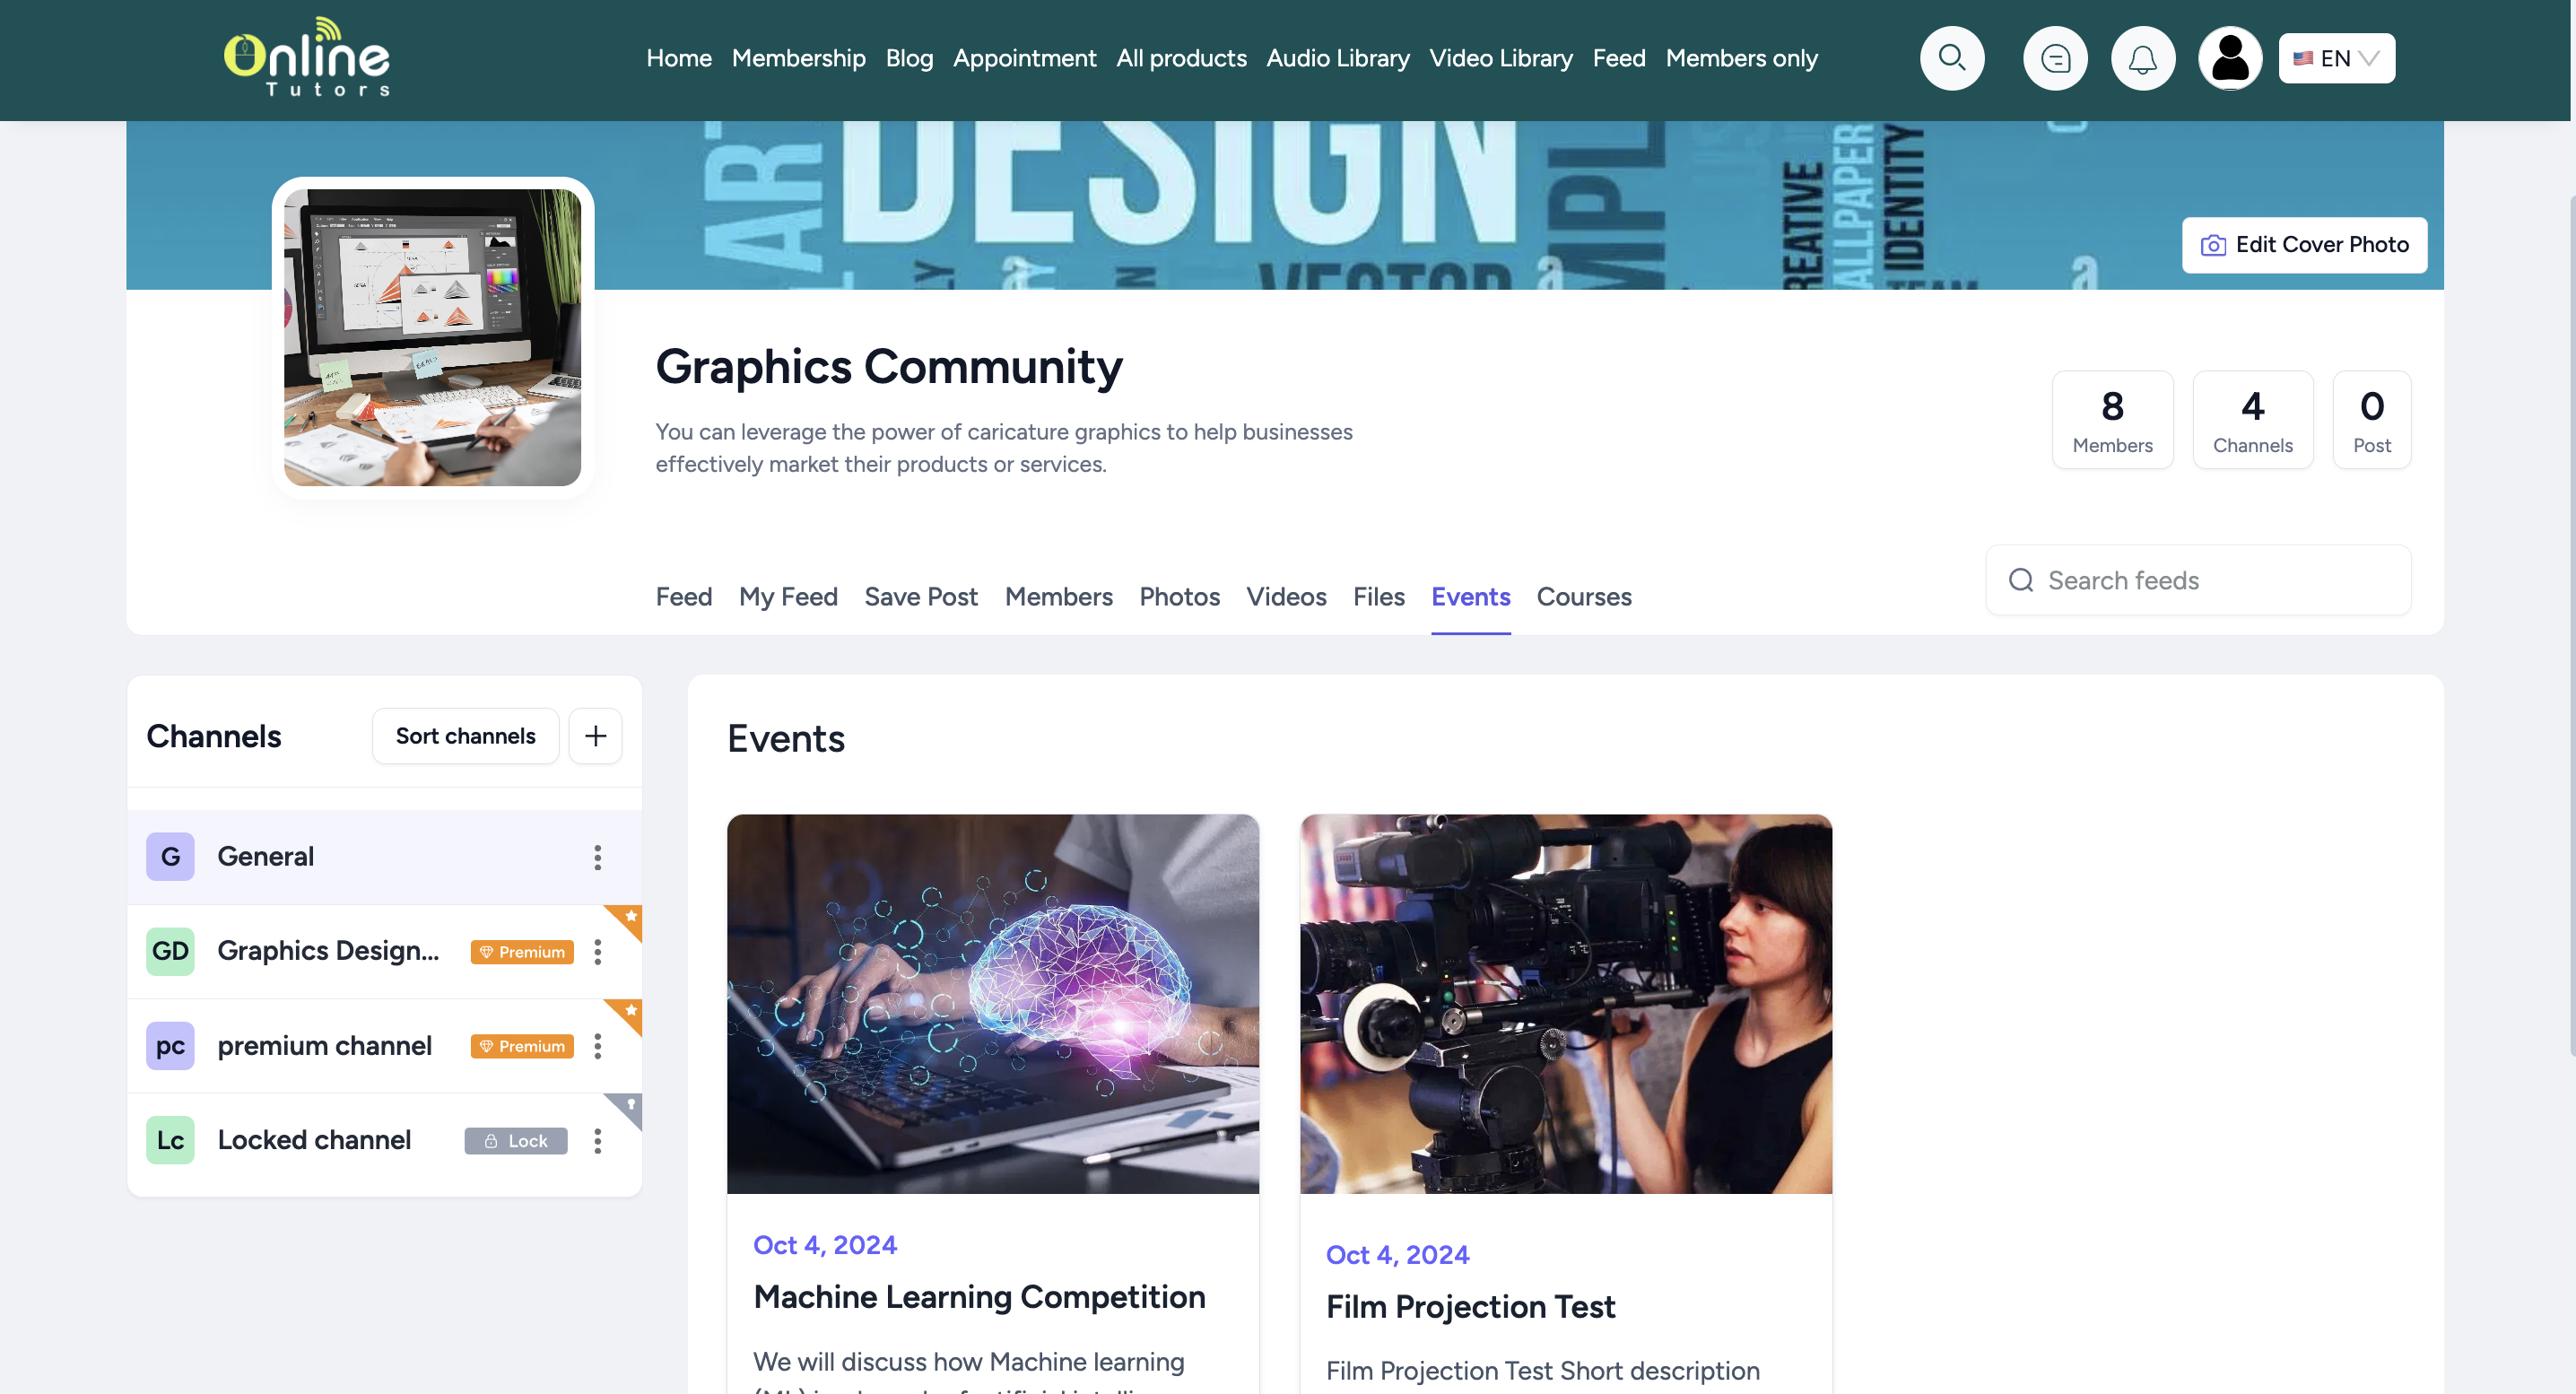
Then, you can also show events from the community. So, your audience will be able to view and join events from the community.
Moreover, there are many more tabs like videos, photos, files, members, etc.
What’s more, you can allow your students for a one-to-one private chat like this.
